Saturday 30 April 2011

On the Wings of a Butterfly - Sunday Stampers

Good Evening Crafters

Well, I don't know about you but I thought that Catherine Middleton looked absolutely stunning on her and William's Wedding Day yesterday and I wish them both all the best for the future. 

Down to business.  Here is my little creation for Hel's Sunday Stampers Challenge!  I really must get in the habit of making these a little earlier in the week, so that I am not trying to finish them in a rush on Saturday afternoon!  Woops!  I solemnly promise Hels to undertake them a little earlier.  Not that I expect you will be looking at your blog much as you have jetted off to the US and left us to go to a certain place.  I hope you have having a FAB time!!
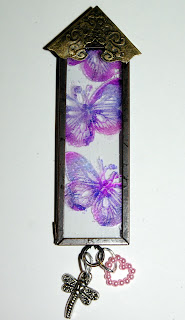
As you can see I have had another go at the old alcohol inks by inking a microscope slide with alcohol inks (Sail boat blue, Plum and Mountain rose) then stamping a Butterfly image with one of my Cavallini stamps using Perfect Medium to apply clear embossing powder, heating the powder up (carefully!) then wiping the surface with Blending solution.  I then popped it into a Memory Frame with another clear slide in the back, adhered a corner with Glossy accents, attached two small charms and here we have my little "Wings" piece.  (I tried really hard to find a way of putting a picture of Paul McCartney and his band Wings on a memory glass but to no avail!  Darn it!!)

I just love the way that the colours have combined and made a gorgeous shade of purple - a good shade for butterflies me thinks.

This will not be the last time you see this little piece, as I will be using it to make my piece for Grungy Monday which I will post tomorrow.

Enjoy your weekend, and don't forget to leave me a comment so that I know you have been.

Au Revoir!

Hettie
Wednesday 27 April 2011

WOYWW 99- A Real Mess I am Afraid!!

Hello there Fellow Crafters

It is Wednesday, not quite 5 to 5 (giving my age away there don't you think?), so it is time for WOYWW!!  I cannot believe that it is the last one in April.  Where has this month gone?  If you do not know what I am on about, then click HERE and you will be whisked via Crackerjack magic over to the desk of Julia who is the host of WOYWW.

Well, here goes... I am afraid that my desk is a real mess this week (nothing much new there then I hear you say!) as I am mid project.

I am making a paper bag album in the style of Laura of Following the Paper Trail who I found on You Tube  HERE .  I loved her album and decided to use all the paper bags I had left to make an album of my Coast 2 Coast trip I made on my bicycle back in 1999!! It is still in the "putting it together stage" but it should not take too long now as the hard work has been done, including the canvas cover. 
I coloured it with acrylic paint first and then sprayed colour washes (don't ask what colours - I just kept grabbing different ones!), then I did not like it so I swooshed the canvas with babywipes, added more paint, then more colour washes, wipes until in the end I decided that I should let it dry and see what I thought in the morning.  I loved it once it was dry so just added some glimmer mist to give it a little sparkle and adhered it to the book!
You may notice that there is a Lonely Planet book on Scotland on my desk too.  I find these soooo useful when adding journalling to my albums as they provide information which may have been forgotten in the meantime.  I bought this book only three years ago when Hubby and I went to Scotland, even travelling on some of the roads which I undertook on my tour.  I think we were both shocked at some of the hills I climbed!!  Especially so the Lecht Ski  Centre and Tomintoul!!

Well, off to have a go at driving my jalopy (Clarissa) today!!!  Yippeeeee!  My knee has come on leaps and bounds in the last few days, including my ankles becoming my own again and not the horrid puffy swollen ones that were not mine!!!  I have been very good at following the advice of the Physiotherapist and Frankie at doing my exercises every day, and I feel it shows!  Thanks Guys!!

TTFN

Hettie

Sunday 24 April 2011

Grungy Monday 4 - Spring Blossom or Kung Fu Panda!

Good Afternoon Crafters and a Happy Easter to you All!

What a gloriously beautiful day it is today.  I am a little early blogging today as Hubby has a little job for me this afternoon - painting his bee hives which he bought yesterday.  It appears that he is needing to get another bee hive up and ready quickly as there is a chance that half of his current hive might be house hunting pretty soon!  I came to a deal with him that if he cuts the grass I would paint the hive as I cannot do too much with my knee at the moment!!

I have joined in once again with the Grungy Monday albeit a little late!  This week we were to watch THIS video which is from last year's 12 Tags of Christmas by TIM HOLTZ using texture fades and distress.  I am loving these challenges and loving the work which other participants have undertaken - inspiring!
The title has come about as I was trying to create a Spring Blossom tree reminiscent of some of the wonderful ones we saw yesterday on our little excursion through the countryside of Gloucestershire.  However, as I was laying the flowers out to see how I would put them Hubby came in and said it reminded him of Kung Fu Panda where they were discussing the Apricot Blossom.  I was not sure whether to be offended or flattered!!  (He did get a playful thwack tho!! LOL!!)
I stamped my flourish stamp (Rusty hinge DI) onto the embossing folder after first cutting the folder, as Tim does on his video, so I could feed my tag through, then ran the folder through my faithful Big Shot (it ain't broke so I am not replacing it!), then inked the tree with some DI (Forest moss), before embossing it with clear embossing powder.  I then inked the background of the tag with some DI (Peeled paint, Rusty hinge, Mustard seed, Pumice Stone) and then distressed the edge  of the tag with Walnut stain. 
I stamped the mini birds, with Vintage photo, the sentiment and grass with Forest moss.  I then attached the flowers which were from a set of Cosmo Cricket having first used some brads which I have had for eons and cannot remember what make they are, with foam dots.  A little bit of fluff and ribbon for the top and a brad through a flower and hey presto another little tag for my "wall" of tags. 

 Incidentally, it is not a whole wall of tags that I am attempting to create, rather two wooden pieces that go down the length of the room (they have a proper name but I cannot for the life of me think what it is but they support the roof!) which I covered with cork floor tiles so that I could pin things to them as a notice board type thing.  I have started at one end of my room with my tags made for this challenge and also some which I have made for previous tags. Maybe I will show you when I have covered the "board", say, half way!!

Thanks for looking and don't forget to leave me a note to let me know you have been.  I will come and have a look at the other challenges later today when the sun has gone in and the hives are painted. 

Now then, where is my chocolate?  Not had any for 46 days and cannot wait another moment!  LOL!!

Happy Easter!

Hettie

Saturday 23 April 2011

Love Challenge - Sunday Stampers

Good Evening Crafters

I do hope you are all having a fantastic Easter weekend and are able to enjoy this wonderful weather we are having at the moment.

Hubby and I went over the border to Gloucestershire for some Bee Keeping stuff which needed picking up, and everything looked gorgeous with apple trees blossoming, and an awful lot of Hawthorn blossoming too - more than I usually see I feel.

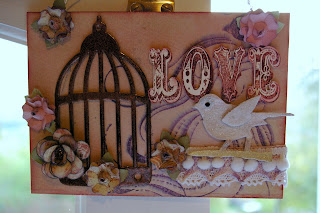
Well, I am here again entering a piece for the Sunday Stampers Challenge by the skin of my teeth!  LOL!  You would think that as I am off at the moment I might be able to organise myself to get it done earlier.  However, I am working on something else at the moment and have been distracted.  More on that project when it is finished.  Here is my piece...


(I have to say that the pictures have come out a little dark so apologies for this.) 

I have chosen to do this little piece as this die has got to be my favourite die of Tim Holtz and indeedy all the dies from Sizzix.  The only other one which comes close is the Sewing Room die.  The little birdie is sooooo darned cute and can be used sooo many ways.  In this piece I have even tried out my crackle paint in Rock Candy for this little birdie.  Over the top of the crackle paint I used my latest DI, Pumice stone.  I also used copper embossing powder and then UTEE over the top of the bird cage which gives it a lovely metallic finish.   

The flowers I have made are one of the Grungey flowers which Hels favourites and my latest craze of small flowers made using a Tonic punch.  I really love these flowers.  You are gonna see alot of them popping up in the future. 

And tah dah!!  I have finally taken the plunge and bought a Distress Stain and coloured in one of the laces with it - Dusty Concord.  There may be more popping up!!

Don't forget to pop HERE to see some other pieces entered into the Sunday Challenge and have a fantastic Easter tomorrow, but don't eat too many eggs!!

TTFN and don't forget to leave a comment so that I know you have been.

Hettie

Ingredients:  Ranger - Die, Birdcage; DI, Aged mahogany, Antique linen, Old paper, Dusty Concord, Tattered rose, Spun sugar; Distress stain, Dusty concord; Crackle paint, rock candy; Stickles, black; UTEE; Stamps, Tim Holtz Mini Cirque Alpha, Stampin up; K&Co papers; ribbons, lace, wire, foam pads, embossing powder. 

Thursday 21 April 2011

Mini Squashie Cutie Album - Finished

Hello and Good Evening to all you Crafters

I hope this Maundy Thursday finds you all well and that you are all looking forward to a nice long, healthy and Happy Easter weekend whether you are a believer or not.

I promised you a look at my new album which I have made as a result of THIS posting on Karen's blog.

Here it is again for you to see.....
Front cover.....

Back cover....

Inside....


Flip it over....


And do you mind if I show you the flowers on the cover in close up?  I made those myself using a punch and yesterday I bought a teeny weeny punch in order that when I make these flowers in future they may have leaves!! I cannot take the credit as I saw it on a blog of Kirsty Wiseman!


I must also make a little confession to you all.  When I saw the original posting on Karen's blog a week last Monday I was very good and made a note of all the requirements so that over the week I could be prepared for Monday when Karen posted the instructions.  I had decided that I would NOT look at the finished book so that it would be a mystery project.  However, a little into the instructions I recognised the method as I had made an album like this as part of my Paris album (I will have to show you that one as it is one of my favourite projects which I undertook!).  I thought about putting the tools, papers and photos down but hey no!  Carry on I did.  And do you know what?  I REALLY enjoyed making this album, especially as the subject matter was so special to both Hubby and myself. 

When I saw Hubby's face when he looked at the album I knew I had made the right decision to carry on.  So HUGE Thank you to Karen for putting this album on your blog and I will go back to the previous monnths' postings to look at the others and I will look forward to your May album. 

Alot of these photographs were just in a folder (which I could not close properly as there were too many) and I knew that they would not make it to a scrapbook layout as some of them were not very good quality, blah blah blah, but to be able to put them into an album of this nature was ideal.  29 photographs I used altogether.  The most in one project EVER!

Thanks again Karen.

Why not pop along to Karen's blog and join in.

Happy Crafting over this weekend and I hope the Easter Bunny brings something nice for you this weekend.

Hettie

Ingredients:  Papers MME 6" Wild Asparagus: Cardstock, Bazzill; DI Vintage Photo, Aged Mahogany; Sentiment, MME Laundry Line; Stamps, Making Memories, Autumn Leaves, Tim Holtz; Ribbon.

Wednesday 20 April 2011

WOYWW 98 - Not Alot Happening Here...

Good Evening Crafters

How are you all out there? I do hope you are all enjoying the lovely weather we are having at the moment.

I am a little late today but I do have a really good reason Special Agent Lynne!!  I was dropped off at my Fabby Buddy Mandy's house at stupid o'clock this morning, hence I could not get to photograph my room and write my post for today.  Then my very kind Buddy took me to the Hospital where my stitches in my knee were removed!!!!  Yippeeeeee!!! A little spot of breakfast at Ben & Jerry's (Frank & Bennies really -don't ask why we call it Ben & Jerrys!! LOL!!) and then a bit of a girlie day which we have not had for absolutely ages (aka Retail Therapy!!!!)  We had to take it easy with little stops on the way but a FAB day.  A Huge "Thank You" goes out to Mandy tonight! Also, thanks to the Nurse at St Joseph's for not hurting me!! Phew!!

Now, down to business, here is my desk as it stands at the moment......
and from this angle.....
and from this angle....
No matter which angle I take the photo, my desk looks a mess.  It has the remains of my stamp book which I made at the end of last week, the remains of my lovely mini album which I finished yesterday, and some punches which I used to show Mandy how I made the flowers on my mini album.  Oh! three photos which I am trying to figure out a layout with.  I do recall that I am a Scrapbooker!!!

I will post my mini album tomorrow as it was made as a result of  Karen's Mini a Month Challenge on THIS blog.  I really enjoyed making this album and you can see why I did tomorrow.  Thanks Karen.

And the eagle eyed amongst you might have spotted that I have now gone double decker on my tool spinner - how cool is that?!!!

Now, if you are wondering why I am showing you photos of my desk then pop along to THIS blog where you will see lots of links to other like minded Crafters who show their desks off publicly on a Wednesday and visit lots of other crafters and their desks.


Off to the Physiotherapist tomorrow so will no doubt be hurting a little by tomorrow evening!!  May need some crafting therapy to compliment (and use) my retail therapy of today.

TTFN.

Hettie

Sunday 17 April 2011

Tutorial - Stamp Book

Good Afternoon Crafters!
What a beautiful day it is here.  It is almost criminal that I am sat in my Craft Room writing up this post, but I promised to give you a tutorial on my Stamp Books, and I am not one to break a promise, especially when it comes to one of a crafting nature.
Are you with me and are you ready to go?  Then I will begin.
You will remember I gave you a bit of a list HERE so I will not bore you with that again and will get straight in to the how to.
Firstly, you need to cut the covers out of the chipboard.  I am making a Stamp Book which will hold my unmounted rubber stamps, as I have been naughty this week and ordered some lush stamps from Crafty Individuals and as I already have a few, I could do with a book dedicated to Crafty Individuals.  So I measured the A5 zip folders which I have purchased from Rymans and they measure 7" x 9 1/2", however, I have bought some of these folders in the past which measured 10" so, in the interests of interchanging my folders, I have cut the chipboard at 7 1/2" x 10 1/2".


If you are making covers to fit either the Tim Holtz stamp sheets or replacement folders, these measure 7" x 8 1/2" thus the covers I usually cut for these measure 7 1/2" x 9". 
If you are using any other stamp sheets e.g. Wendy Vecchi, then I suggest that you add 1/2" onto the size of the sheets for the covers.
Please TAKE CARE when cutting the covers as I don't want to hear of any blood being spilt in the name of art.  I have Winnie the Pooh plasters in my room but it would be tricky for me to administer them for you.

When choosing papers to cover the chipboard, be aware if you are using stripes or definite patterns that you do not inadvertently place chipboard upside down.  I tend to use a heavy paper/cardstock to make covers as the book will need to withstand a fair amount of usage, being taken to crops and being pushed and pulled in and out of shelves in your craft space.  I am using My Mind's Eye Washing Line papers for the outside covers and plain cardstock for the inside.  This is because I really love these papers and tend to stroke them, it will be lovely to see these papers in years to come still being used.  Plain cardstock for the inside as I like to stamp the insides with stamps that are being kept in the book.  After all, it is a stamp book!
Once cut, double check your measurements rather than wait until later, to ensure that the covers are the correct size.   If any of the edges are rough you can smooth them using sanding block or files, whichever is your tool of choice.


Using the papers you have chosen for the outside covers  apply your adhesive of choice to the chipboard (I previously used mod podge, but will be using Christine Hellmuth matte medium in future lurve this stuff!!).   Now do not be tempted to put a lot of adhesive on the chipboard, you do not want to soak the chipboard, else you risk making the paper wrinkled.  However, please make sure that there is enough adhesive on the edges of the book so that the paper doesn't peel later. 
Once the paper and chipboard cover are together, I use a brayer to try to ensure the paper has been pressed down and avoid any air bubbles being caught under the paper.  Also, be careful that if you are using a patterned paper with stripes, that you have put the paper on straight, and also, not upside down.
You will now need to leave to dry.  Be patient.  I usually leave this overnight to give it plenty of time.

Morning!!  Next trim the excess paper from your covers.  BE CAREFUL not to cut yourself.  Whether you use a metal ruler or just the edge of the covers to guide you is up to you.  If you do not cut flush with the edge of the covers, do not panic as we can file it down later. 

Keep all the excess bits, as we can use these to decorate the cover and also make the "closure".
Check that the edges of the cover have been adhered, if not use a little of the adhesive (here you can use the tiny Christine Hellmuth matte medium to "inject" the adhesive in). 

Sand the edges if you need to, to ensure that the paper is flush with the chipboard.  Hold the sander/file at an angle 45 degrees, holding the paper side towards you and file away from you avoiding any sawing action.


Now is the time to think about how you are going to close the book.  I tend to make a "flower" using cuttlebug flowers and ribbon, but I have also used a button (see the Christmas book on THIS post). 


To do this, measure the centre of the back cover (reverse side) and about an inch in from the edge (don't forget to check that it is not going to upside down with the paper) and make a mark, on both the front and reverse covers. 


At these marks, using the largest hole on the Cropadile, make a hole.  On the reverse cover attach a large eyelet and thread a piece of ribbon leaving about 1 1/2" on the inside.  Adhere a small piece of masking tape catching this ribbon so that it cannot be pulled through. 


Burnish this masking tape and ribbon in order to flatten it.  Being careful not to get glue onto the ribbon, adhere the remaining cardstock onto the inside covers (use brayer).  Try and avoid getting any adhesive on any part of the cover where you do not want adhesive to show (this is where the matte medium is sooooo cool!). If your covers became a little curved when you adhered the front covers on initially, layer the covers with some sheets of plastic and place a weight on top and let them dry - again overnight is best.

Now onto the front cover. I will show you how I make the flower but you can make yours any which way you choose. I make a cuttlebug flower using four layers.


Ink the edges and make a hole in the centre for the brad. Ensure that the brad has long "legs" so that it cannot be pulled through easily. Place each layer of the flower in your hand separately, and push your thumb into the centre so that the edges curl a little. (I don't have the posh tools for this!)  Layer the flower and push the brad through the flower then attach the flower by pushing the brad through the hole in the front cover and separating the legs at the back of the cover.
  
Now the inside covers are dry, cut the excess cardstock off (avoiding cutting the ribbon in error!) and again file/sand the edges if necessary to ensure the cardstock is flush with the chipboard.  Mark out where the holes are going to be for the rings, using the stamp sheet or if you are making a zip file version mark where you choose.  Using the largest hole on your Cropadile, make the holes, again, checking you have the covers the right way round!

Ink the edges of the covers or use Krylon pen, whichever you prefer.


If you are making a book based on the Tim Holtz stamp sheets/replacement sheets, you may wish to round the corners before inking with a corner rounder.  As my zip files are very much squared off I decided not to.


 In the case of the zip files, use the covers to mark out where you are putting the rings.  As I want my folders to be interchangeable I used a zip file out of my current book as a guide. 


Don't worry if you can see on the inside of the covers, where you have attached the brad and ribbon for the closure, a little strategically placed die cut/sticker will hide this!! 


Assemble your book with the rings, stamp sheets and then here comes the fun bit.  You can decorate away on the covers to your heart's content. 


Have fun.
I am going to decorate mine during the week, and will show you what I have done next weekend.
Please leave me a comment with a link to your blog so that I can see what you have all done when you have completed your book, and I hope you have enjoyed making this stamp book with me. 
May you have lots of fun using this stamp book over the next few years.
Don't forget to leave me a comment so that I know you have been.
Happy Crafting
Hugs
Hettie


Saturday 16 April 2011

Grungy Monday # 3

Good Evening Crafters

What a glorious day it has been here in the Brecon Beacons today.  I do hope it has been as nice for you wherever you are in Blogland!  Hubby and I have been having a closer look at some of the plants in the garden which we thought had perished in the cold winter that we have had, and quite a few of them have suddenly sprung into action over the last week, including a beautiful Clematis which to my knowledge has been growing up against the wall for 24+ years!  I am sooo happy it has survived as it really is beautiful when in full bloom.

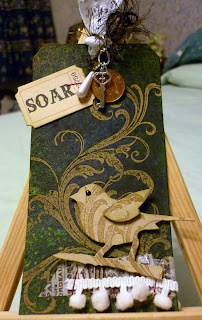
Well, down to business of my posting.  I was having a bit of a play in my Craft Room with some of my colour washes including the piece I posted last night (click HERE if you want to have a peak).

Although last night's posting meets all the criteria for the Grungy Monday Challenge, I had previously decided that all my GM pieces would be tags so that they can go on my Wall of Tags (I will show you that once they start building up!).  So, I had to have another play with inkey washes, which I lurve!! (Don't need much of an excuse to play do I?!!! LOL!!)
If you want to see some more wonderful pieces of art which have been made using Adirondack Color Wash why don't you click HERE whereupon you will be whisked over by Fluepowder to our Leader Linda's blog where you can see some fantastic pieces of art, including a wonderful scarf which I am going to have to try to figure out how it was done!
If you click HERE you will be whisked over to our Lord Tim Holtz's wonderful blog where you will be able to link to Tim's blog, workshops, videos, products, gallery and videos.  A wonderful place for inspiration and ideas to make beautiful pieces of art.
While I am here, I just want to show you a fabby picture of my lovely little Dobby which Hubby took last night.  I tend to sit on our settee these days so that I can sit with my feet up (Doctor's orders!) with a Welsh wool blanket to keep my toes warm.  Dobby also tends to cwtch up with me on the settee.  However, last night Dobby sat at the bottom end of the settee where Hubby caught this photo.  Doesn't he look soooo sweet?!!!  Bless him!
Off to look at the other participants of  this week's Grungy Monday.

Enjoy the rest of your weekend and please don't forget to leave me a comment so that I know that you have been.

Hettie

Ingredients:  Ranger - Tag die, bird die; Color wash. stream, bottle, red pepper; Perfect pearls, kiwi;  Inks, Embossing ink, Vintage photo; Adage ticket; Tissue tape; Enamel; Hero arts stamp; Lace, fluffy thread, key, penny, embossing powder, bobble edging, kraft cardstock.