Showing posts with label Vellum. Show all posts

Sunday, 31 January 2016

First Rudolph Day of 2016

Hello there My Friends

Gosh where did January go then? I don't know about you but I have been pretty busy this month with one thing or another and to be quite honest, I am hoping that February and the rest of 2016 will be a bit kinder to me.

So here we are at the end of January and I have two cards to share with you for the Rudolph Day over at my friend Mo's blog.

Here is the first one...

I stamped some Snippets of red card with the bauble stamps and die cut them with my Spellbinders dies.  More Snippets for the Memory Box ribbon and Penny Black sentiment, a little ribbon onto the background MME paper and a card was born.

And just for good measure, I made another card....

Again I used some Snippets including the glitter paper border down the side and the vellum.  The lady was cut a long time ago when I was with my friend, and I will try and use the rest of them.  It needed a little dolling up when I finished, so added some glossy accents and sprinkled MS glitter over.  The vellum was left over from another card which I stamped the Stampenduous border stamp and embossed gold powder.  No idea where the background music paper came from, I found it in my Snippets drawer when I was clearing it out. 


Running off to my friend Mo's Rudolph Day and the Snippets Playground with my cards.  See you on the swings with Parsnip.  I need a cwtch with my fluffy friend!!


Wednesday, 25 November 2015

NBUS Christmas Stamp....Yippee!! and Rudolph Day

Greetings!

It is Santa's Head Elf here sharing with you a NBUS Christmas Stamp on this auspicious day.  Why auspicious?  Because it is the last Rudolph Day before the Big One!!!!  

So to kick this Rudolph Day off here is my first card....
Isn't that stamp just gorgeous!! My lovely friend from over the water sent it to me.  You know who you are.  MWAH!!  It is by Stampenduous and is called Fireside Ivy.  I actually got the inspiration to Viv and I hope I have done her card justice!

So what I did was to stamp it on a background card with Versamark and embossed it with white WOW embossing powder.  I did the same again on some vellum.  Then I took my oval die and cut out the middle of the vellum piece before placing it over the top of the background card and securing it with brads.  I then mounted the whole thing onto the card, added some faux stitching with my Sharpies white chalk pen and added some ribbon with a little stamped tag (Hero Arts stamp).

Now what do you suppose I did with the vellum centres that were cut out?  Yep, like a good little Santa Elf I cut some more ovals from plain card and tied them together to make tags for my parcels.  How is that for recycling my Snippets?

Right that is all from me.  I must get busy as the Chief Elf (i.e. the chap in the red suit) keeps going on about deadlines etc.  He is a bit tetchy right now!!

Off to share this with my buddy Mo and of course my other buddy Parsnip down at the Snippets Playground.  

Thanks for calling by.  Will pop over later once I have done my dance class.

Hettie

Saturday, 25 October 2014

Rudolph Day Playing with New Toys...

Hello there!!

Happy Rudolph Day to y'all!  I do hope you have a great weekend in store.  The weather outside Hettie Towers looks set to be a lovely Autumn Day.

As you my lovely followers will know, the 25th of every month is known as Rudolph Day on which I share two or more Christmas Cards with you and join in with my Buddy Sandra's challenge.  Yes, you may have noticed that I have said the full C word...CHRISTMAS!!  As far as creating things is concerned I now think it is ok to use the Christmas word.  As for shops and things I still think it is a little too early to have started in August and that maybe mid November is ample soon enough.  

OK!  I have stepped down from my soap box now.  Here are some cards on which I have used some new toys NBUS which I bought on my recent trip over the Pond...

I just fell in love with the Penny Black die, though I must say that if you are using anything less than cardstock it is a little trying to get it to cut.  This mirri card works like a dream though.  I took a cream card, stamped it with Archival ink with a TH text stamp.  Then attached the PB die cut.  Out of two Snippets I cut the red X Cut shape and also a cream.  The MC is another new TH stamp which I rather like, again stamped with Archival and embossed with clear embossing powder.  

I had a little rummage in the Christmas basket and found the very last K&Co rosette (had them so long I know I won't find again, though it doesn't stop me looking), the ribbon was in the Ribbon Snippets basket and the pine leaves were from the Tin of Shame.  

Next...
This time I stamped the background with some versamark using a snowflake stamp from the same new TH set and embossed with some sparkling snow WOW embossing powder.  I then stamped the pine needles with Pine Needles DI and touched it up with my Wink of Stella pen.  Now I didn't know that you could get coloured Wink pens.  I have only ever seen them clear.  So when in Absolutely Everything I gayly picked up a pen not realising until we were back at our accomodation that it was green.   However, now that I have tried it I LOVE IT.  See!  You can really have "happy accidents".  I adhered a small piece of the PB die cut to one side and found some more ribbon to go down the centre.  Then I stamped another of the TH set with Archival and embossed with clear embossing powder.

Last one for today...

This was the third attempt at cutting a thinner card using the PD die.  It was not very nice trying to cut it.  I used a red card and stamped it with my favourite TH swirl stamp and embossed with gold.  I then took a piece of cream cardstock cut to the same size as the PB die cut and stamped with the TH text stamp.  I adhered the die cut over the top and stickled each interlocking section.  I cut out a TH Poinsettie with cream card and stamped with the text stamp.  On another piece of cream card I stamped the Merry Christmas and die cut with my X Cut die as well as a piece of vellum which I tucked behind.  With a piece of ribbon laid across the bottom I then layered the poinsettie and stickled the centre.  

Hey presto three cards made in one afternoon, all of which I am pleased with and  I hope you like them too!  Just sorry about the photographs having sunshine and shade.  It is getting harder to take photos in the morning now being so dark.

Right, off to take this over to Sandra and the Snippets Playground, before the gates are shut.  Why not join in and make a minimum of two Christmas cards by the end of the month and you may win a prize.  I am also entering these into the CHNC as they are a little bit Christmas themed!

If you are ever anywhere near Topsfield, do go along to Absolutely Everything.  The shop is amazing.  I walked around it three times before I could put anything in the basket as I just did not know where to start and the staff are lovely.  They haven't asked me to promote them, this is just me telling ya!  It is no wonder it is my Buddy Kim's favourite shop.

Thanks for calling by.  Have a great weekend.

Hugs

Hettie

Sunday, 24 August 2014

Stencilling again...

Hello there!

Brrrrr!  Boy it is mighty cold here tonight!  Not like August should be.  I cannot remember the last time we lit the fire in August!!

One of my friends asked me to make her a card for her friend similar to some I made a little while ago in purple and orange (our company colours).  So I made this one...

I used Spiced Marmalade and Wild Honey along with Dusty Concord and Seedless Preserves DIs and a swirly stencil. 
I used a Snippety Snippet of vellum and cut a tag using a TH die.  I stamped the SU butterfly and sentiment with clear embossing ink and WOW white embossing powder.  I tied some string and then assembled it all together.

I made a spare too.
And you know how it goes...whilst you have the stuff out you may as well make another...

I have left the inside blank for using at a later date.

Right then.  Bank Holiday Monday tomorrow and we have wet weather guaranteed.  Booo.  You know what that means don't you?  No?  Time to play in my Craft Room!!!  Yipppppeeeeeeee!!!

Have a good 'un whatever you are doing!

Off to skip down to the Snippets Playground in my PJs to take these down to the Treehouse!  I am also just about able to link this with Simon Says Stamp's Anything Goes too.

Hettie

Tuesday, 15 April 2014

Scrapbooking Tuesday.....T stands for Friends

Hello there!  

Yep!  It is still Tuesday so I can still (just) get in on the Tea on Tuesday malarky with my mate Elizabeth and Bleubeard!   I was going to post this at lunchtime but the sun was shining so brightly outside my office  window I just had to go an enjoy some and get some vitamin D.  Never mind I am here now.  

Today I am sharing another layout, and the last of my Wedding Album (though I may sneak some more pages in later as I have so many left!).........


Yep - four mates from school.  Helen (in the mustard dress) on the left, I first met when we went to Fairwater Comprehensive (High School), Sarah, next, is my longest friend.  We met when her family moved into the row above our house when we were just three.  Helen on my left and I met when she moved from North Wales to her cousin's house near to mine, and her cousin asked me if I would look after her.  I still correspond with Helen (mustard dress) as she lives in Yorkshire, and Sarah and I saw each other only last Sunday, but unfortunately the other Helen I have not seen for some time.

And here is my mug.  I do like Eeyore - we have the same view of life in some respects.  I am drinking my large coffee having just returned from work!

I used some more papers from the wedding album kit along with some Snippets, McCall punch, Sizzix dies, Cricut, glossy accents, Hampton Art glitter, pearls, TH stamp, Memento ink, Tonic die, vellum and button.

Can you see the vellum peeking from the top of the photo using my new (shhhh!) NBUS Tonic die.  I just love this one (Regal Circle Doily).  I can see a LOT of uses for this one!

I do like this flourish die from Sizzix - I use it so much.  A good die is worth it's weight in gold don't you think?  The layered flower is not used quite so much, yet I don't know why as it is lovely.  

Thanks for calling by and letting me waffle again!  I do hope you have found some inspiration from my post and wafflings.  Feel free to join us over at Elizabeth's for a cuppa and natter.  Also, to the Snippets Playground for a play on the virtual rides.  You may even get to feed Puggles - our new Platypus who seems to want constant feeding!  If I can get him to stay still I will try and get a photo of him to share!

Hettie

Monday, 10 March 2014

Christmas Poinsettia Cards

Hello there.  Happy Sunshiney Monday to you all.

I hope you had a great weekend in all this Spring sunshine?  

On Saturday I went with my dancing teacher to Swansea for a Day School of Scottish Dancing and then a Tea Dance.  It was lovely and we ended up having to open the doors and windows. It was a great day and I learnt lots of hints and tips as well as a few new dances. 

Sunday I spent outside actually hanging washing out and letting my Girls have a good romp around in the grass. 

Today I am going to share some cards with you.  All made using die cut vellum and creating poinsettia which I moulded, scored and coloured with Copic pens. I used darker reds and greens than I did last time so that they didn't look quite so pink!  


I would hate to try and guess how old some of the brads are.  I have even used a NBUS on here.  I am always looking for small shapes on which to stamp sentiments and I saw a Spellbinders sign die going for a song so I snapped it up.  Just the right size for this and some other stamps.  Much better than wonky cuts!

One of my favourite MB die cuts here.  Love the bow and star.  I have looked at other versions but still love this one.
A change of "ribbon" below.  I used my EK Success punch and added little stickles for embellishment.
So that is all from me today.  A little bit of Christmas on a sunny day.  More to add to my box - yippee!

Have a great day.  I shall hopefully be able to call by later when I get home.  I am taking this down to the Snippets Playground as there are a plethora of snippets in these cards.

Hettie

Thursday, 6 March 2014

Silhouette Mat Replacing Tutorial, Home Made Stencils and Cards......

Hello Friends

Before I start I would like to thank my latest followers Denise and Princess Judy.  Thank you both for following me and I hope you enjoy the ride!  You might want to get yourselves a cuppa before reading today's post.

This is a project I was doing just before I fell ill but haven't got round to sharing it with you.  I joined an online class for stencilling - something which I have dabbled in but I don't use them a lot.  The online class is available after the class finishes so I can dip in and out of the course when I feel like (just as well as I fell ill at the start) and it is kept there ad infinitum.  

My choice of stencils is limited, hence why I don't use them an awful lot and I had a brainwave! (Yes it hurt!) I have template plastic (VOS) for creating quilting stencils.  Would it cut on my Silhouette?  Sounds simple doesn't it?  However my cutting mat for my stencil was naff not very good and I wanted to do this there and then.  Also, the mats have become very hard to source and very expensive since I first had my Silhouette.


So I took a sheet of laminating plastic and laminated it.  Took another sheet of laminating plastic and laminated it with the first laminated sheet inside it.  Are you with me?  Then I placed some masking tape down the long edges of the "mat" about 1/4" in.   
Then I took my Crafters Companion Stick and Spray Temporary glue. (We don't want it sticking there forever do we?)  Something else I bought ages ago and have not used much!  

I then sprayed the mat lightly, covering the surrounding area first, with about 5 thin coats.  I then removed the masking tape and replaced it.  These are where the wheels move the mat along the cutter, so you don't want them tacky.

To protect the mat between uses I took some freezer paper and cut a piece to fit and use it shiny side down.
Then I downloaded a design from Silhouette, placed some template plastic on the mat and watched with baited breath to see if the plastic would cut.
I need not have worried.  It cut like a hot knife through butter and the mat did it's job perfectly.  This design is called "Kite".

Here are some samples I made using just three colours of DI.
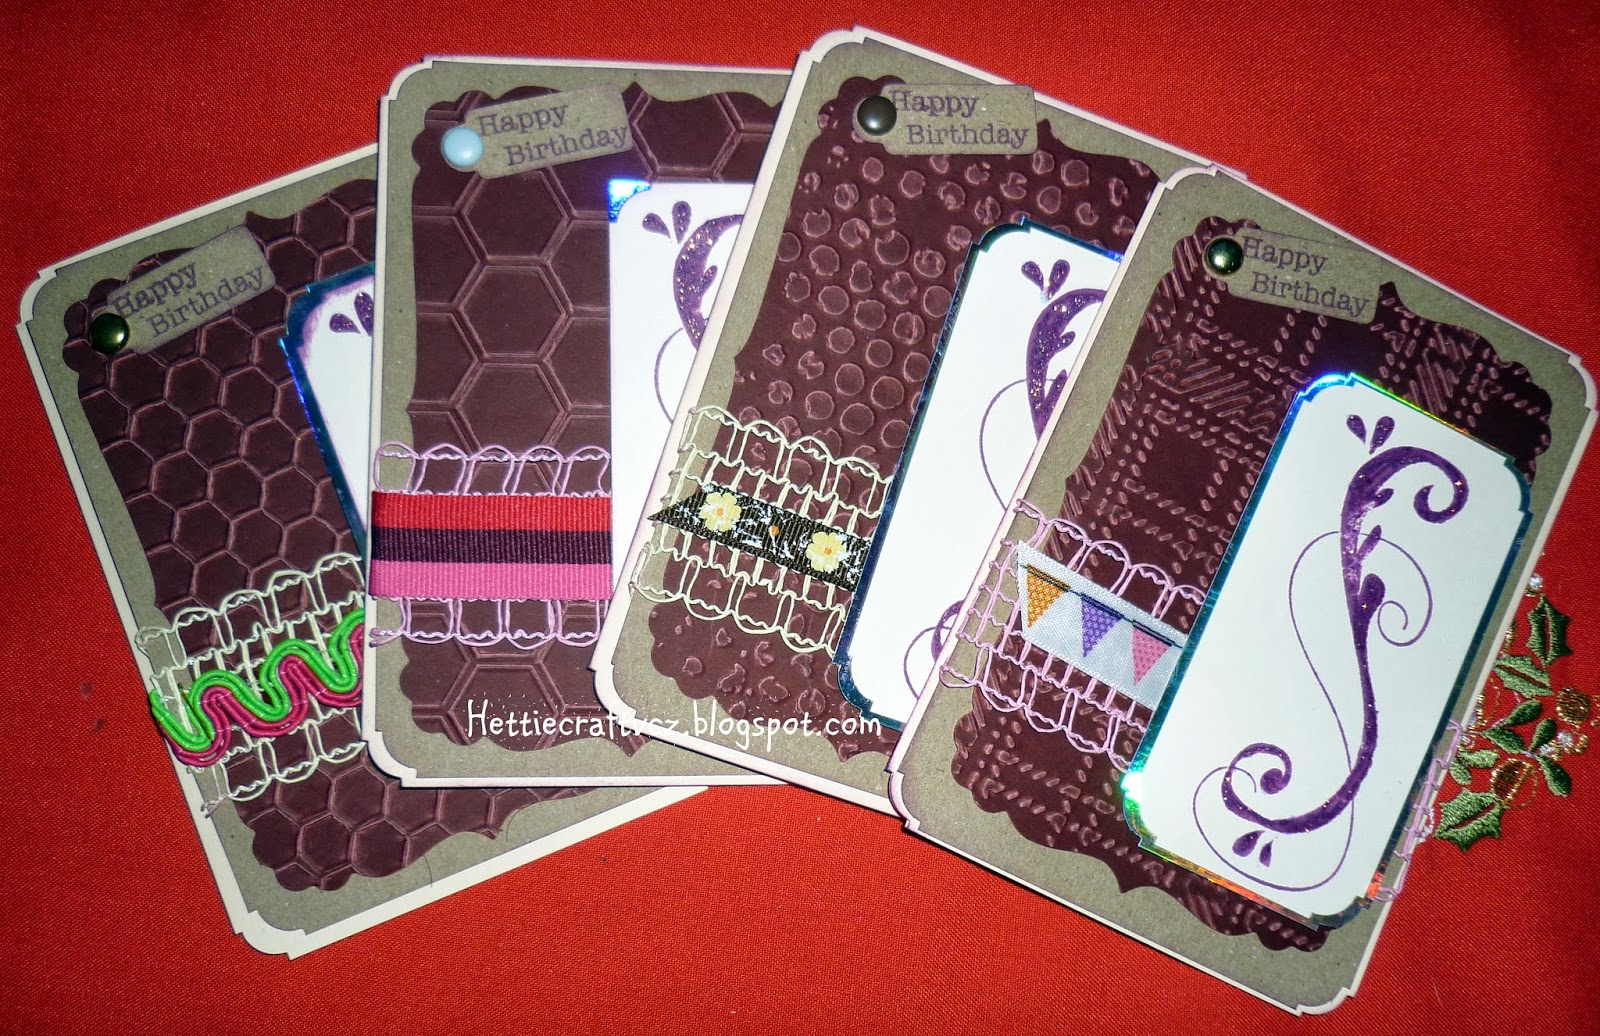
And some finished cards....


I used some Snippets of vellum, cut some tags (the snippets dictated that some of the tags are shorter than others), tied some twine and adhered them to the card using a teeny bit of glue behind the twine and another behind the butterfly.

Overall I was extremely pleased with the mat and the stencil.  So much so I went online to a very well known auction site and ordered some A4 template plastic so I could make some larger stencils.  All this came with a bonus - all the materials were already in my craft room.  I love it when two crafts collide (template plastic and freezer paper both being quilting tools).

Whilst I don't suppose Silhouette would advocate making your own mats, when they are getting like hen's teeth to get hold of then what are we supposed to do?  If you decide to try this, do so with caution.  I am no expert and will not be held responsible for any mishaps.

Thanks for calling by.  Sorry it is a little long today but I wanted to show you how I created these stencils. Please let me know what you think!

Hettie    

Monday, 13 January 2014

Snippets cards

Hello There

Oops!  Sorry I have been away from the Blogging World this weekend, but I have been a bit of a busy bee in my absence!  I went to my Buddy's on Saturday for a scrapbooking session and then yesterday I had a bit of a clearing spree.  I wanted to get two very large cupboards thinned out enough so that I only had one cupboard and the empty one can be converted into a wardrobe in the guest room.  Once that task was achieved I then moved into my Craft Room and cleared some crap stuff so I can get things off the floor and generally make life a little easier for me.  Hubby better watch out or I shall move onto his sheds next!

So here I am again all geared up to start the week off with some Snippets cards to share with you.....

I want to restart my card shop in work again as a few people have asked me for cards and I don't have any here in my tin so my plan is when I need a card I will make one for the recipient, one for my box and one for my work tin.  Only here I made four as I have two birthdays in quick succession.

I used some very old stamps which I inked with DI and then stickled over the top of before mounting on some Snippets of silver card, chomping all corners with my Memory Keepers chomper.  I also used a variety of embossing folders and some VOS velum which I have run through the folders after cutting with a X Cut die.  Some snippets of ribbon which came out of the Snippets basket and some mesh which a kind hearted friend gave to me.  
I cut some tags and stamped with Hero Arts stamp.

There you have it, four cards for me to take to the Snippets Playground.

Thanks for popping over.  I shall be calling by very soon so make sure your rooms are tidy!  

Hettie

Monday, 25 March 2013

Happy Rudolph Day

Hello There

Happy Rudolph Day to you all!  And a cold one it is here in the UK too!  Almost feels like Christmas except there are Easter Eggs in the shops! 

Here is my entry into Rudolph Day pot today....

Made using lots of  Snippets so I shall be taking it over to the Playground too.

What have I done?  The velum on the bottom layer has been in my Snippets box for ages.  Then on top is a piece of watercolour paper which I stamped with my Hero Arts stamp and then inked with alcohol inks.  I did this when I first started with alcohol inks so you can take a guess how old it is.  I then stamped a Papermania stamp twice, coloured them in with my Copics, cut out the poinsettia on one stamping, curled it a little and then popped it over the other image to make it 3D.  (Sorry, forgot to take a sideways photo for you to see it, but trust me!)  I then put little white spots of Sharpies pen on each berry before adding glossy accents to them and the centre of the flower to make them nice and shiny.  A Snippet of ribbon and hey presto a card!

I apologise now for not being around much this last few days.  We have a new settee arriving at Chez Hettie this week and of course, I wanted the lounge redecorated before it comes!!  So out came the paint brushes and all the fun and frolics of removing the old settee into the Den, pictures taken down, curtains down and everything moved hither and yonder!!  Let me tell you, painting a wall that is 21 feet long and 7 feet high and is a stone wall, so has plenty of nooks and crannies, is not easy.  I have to do the other wall later tonight in order that I can put the curtains back up before the delivery men arrive!  Poor Hubby had the unenviable task of painting the wooden ceiling! Let me tell you, I would rather have been crafting!

I hope you have a good week!  I am glad to see that Lent is nearly finished so I can celebrate the new settee's arrival with a Baileys or three over the weekend!!  Hurrah!! 

Do join in the Rudolph Day challenge with my dear Blogging Friend Sandra!

Hugs

Hettie

Sunday, 11 November 2012

Musical Christmas - FSC

Hello Friends

At the end of last month I shared with you THIS post which had my altered Mail Box on and which I had entered into the Fashionable Stamping Challenge.  I was very pleased to learn that I had won the Challenge!  

I had not come across this Challenge blog before I was introduced to it by Terry, but I rather like it so I decided to enter the current Challenge which is Music and here is my card.....

The background of the card has been made using my Tim Holtz flourish stamp and gilded with Indigo Blu gilding flakes (first time of using!  Tip - don't sneeze when using these or else they will get everywhere!).  The next layer is a Snippet of SU Vanilla cardstock which has been inked with Brushed Corduroy DI, although you have to take my word for it as you cannot see it until you fold the music sheet back.

The music sheet was created using a WOW stamp, one of my buys on Thursday, on vellum using a technique shown by Mr Tim Holtz on his 12 Tags of Christmas 2009 (Day 9 I think).  I made the music notes with my new Memory Box die, again using a Snippet of SU cardstock, which I inked with Brushed Corduroy DI and brushed over with some gold Perfect Pearls.  
The Poinsettia was cut with very thin chipboard to which I had attached sheets I had cut out of a Czech book which I am using for another project yet to be completed.  I then inked the petals with DSs and DIs, edged with Black Soot DI and swooshed with my new favourite DS Antiqued Bronze. Once inked and dried  I then stamped over the petals with the music stamp.

I also added some smudges of my Treasure Gold wax to give it some sparkle.

Thanks for looking and why not pop over the FSC and join in as you still have a little time?

Let me know what you think!

Hettie
x

Sunday, 7 August 2011

Grungy Monday 18 - Made it!!

Good Afternoon Crafters

I don't know what weather you are all having this Sunday afternoon, but here in South Wales we are having a mixed bag here - sunshine one minute and rain the next!!  My poor chooks don't know whether to be inside or out!

Well, after a panicky week of not being sure whether I could join in this week or not, I have now managed to join in with this week's Grungy Monday Challenge as well as Simon Says Stamp Challenge wish asks for a tag!


The reason I was not sure whether I was joining in is that on Monday evening, having inked up and embossing powdered some flowers to make a schparkly poinsettia, my lovely heat gun decided that it was time to call it a day!  To say I was gutted was an understatement.  I loved my heat gun and hardly a day went by without my using it.

I trawled the internet to see if I could find the same one but to no avail.  I then went to my usual internet shop for crafty things Craft Obsessions and ordered a replacement.  They e-mailed me on Tuesday telling me it was despatched and then I waited.  And waited. And waited.  It finally arrived on Friday!  Hurrah!!  Let's hope this one lasts as long as my old one. 

For the Grungy Monday Challenge this week the lovely Linda sent us HERE where we saw Tim demonstrate a technique involving vellum. 

I could not resist using my lovely new Reindeer Die for a Christmas tag.  Hope you like it.  I think it will be featuring on a lot of Christmas cards this year.  Do you realise it is only 140 days away?!!!

Please do not forget to leave me a comment and please pop over to the blogs by clicking on the purple words above.

TTFN

Hettie

Ingredients:-
Ranger - Heat gun, tag die, reindeer die, DIs Forest Moss, Vintage Photo, Walnut stain, grungeboard, grungepaper, snowflake, dabber paint; Paperartsy script stamp; Penny Black foilage stamp; embossing powder, brown pen, ribbon, bell, fibres.