Showing posts with label alcohol inks. Show all posts

Sunday, 7 December 2014

On the Seventh Day of December...Third Tag of Christmas Funkie Junkie style.

Hello there

Sorry I missed posting yesterday but we had our last Quilt meeting of 2014 and the last in our current venue, so I was out early in order that I could help pack our cabinet up ready for it to be moved.  A lovely lunch was had and I will share the Bran Tub present I made shortly, now that the recipient has received it.

Now on to today's card which I am sharing.  As you will realise by now, I am following Linda of Funkie Junkie's 12 Tags of Christmas, but with cards instead using Linda's tags as inspiration.  So without further ado here is #3...

And now here is Linda's inspiration tag...
 
Isn't Linda's tag just beautiful?

So I guess you want to know what I did?  First off, I didn't have a stencil with snowflakes on so I resorted to my trusty Silhouette and found a snowflake background which I then cut using quilting stencil plastic.  I do love it when my hobbies collide!  I will say this cutting and picking all the plastic took quite some time, but it was well worth it as I know I will use this stencil A LOT!  Thanks Linda for making me look for this. 

Now next mission was to create a background.  I tried first off with some Pine Needles distress stain but this came out too heavy and darker than I wanted.  Hmmmn.  Next idea!  Ahhh Colourwash!  Now I still have the original set of these and there is a beautiful greeny colour called Bottle in the originals.  I poured some into a mini spray, added some Perfect Pearls and topped it up with water to lessen the density of colour and the pearls gave it a fabulous shimmer.  Once this was sorted I wanted some shimmer around the card so I stamped with my Hampton Arts speckled stamp and Versamark. First I used silver embossing powder and then Wow Sparkling Snow embossing powder.

Background sorted, now I needed to work on the rest of the card.  I wanted to add a little metal on there so found a small Snippet of Ranger foil tape, mounted it on to card and then used some Adirondack alcohol inks on there in Copper, Stream, Clover, Silver and and stream.  Once I was happy with the background I then ran it through the B/S with my TH showflake embossing folder and sanded it before trimming it to size.  

For the Snowflake I decided to use the TH snowflake die and a Snippet of white card to which I inked some Pine Needles DI before punching the last bit of embossed metal for the centre.  

Now just for a sentiment for which I reached for my current favourite TH stamps.  I used TH Archival ink and some clear embossing powder.  Once heated and dried I trimmed the card to size, mounted it onto some silver cardstock before placing this onto a blank white card which I had inked with Pine Needles DI.  

Thanks once again to Linda for the inspiration for this card, which so far is my favourite, but at only #3 this may be subject to change!!  Watch this space!!  And thank YOU for visiting my blog and please do let me know what you think of this card.  I do love to read your comments.  Why not give the challenge a go?  It is sponsored by The Funkie Junkie Boutique and well worth entering just to have a spend in Linda's store.

I am sharing this card with the Snippets Playground too as there are several Snippets used up here.  

Have a great week.

Hettie


Saturday, 15 June 2013

Honey for the Honeymoon....

Hello There Friends

And a special Helloooo to Debra and welcome to my little blog.  Thank you for following me.

Sorry I have been absent, but things have been a little hectic in the Hettie household of late.  Mum is still in hospital.  Unfortunately during her stay some nasty kind so and so sat between Mum and the next patient, whilst visiting the next patient with a bad case of Flu and has passed it on to Mum, who like me is susceptible to these kinda things and now has a chest infection on top of the kidney infection she went in with.  As you may imagine, this has upset her just a tiny bit!  NOT!  This also means that I am not able to go visit now in case I pick anything up.  Honestly some people ey!!

On top of that I have been visiting our local hospital too, but I shall maybe tell you about that another time!

Right then.  On to today's post.

As you will know from previous posts recently, we have had a family Wedding recently whereby my Nephew got married.  Well, as Bee Keeper of the family we had to give some Honey to the Honeymooners.  However, I could not find a honey jar locally that I liked so I got to do my own jar instead.

I took a standard Kilner jar and decorated it.  Why not?  The papers used are the MME The Sweetest Thing range in 6x6".  Dies used are Memory Box which I bought at Ally Pally.  Let me just tell you, those Bees are little buggers blighters to make!!!

Any excuse to get the alcohol inks out to make a tag for the jar using memory glass and the stamps that came with the papers.  Well, it would have been rude not to buy them too (and the 12x12" papers of course!)

Here is the top of the jar, which I used some Spellbinders dies.

Don't you just love this ribbon?  My Buddy brought that back from USA for me, though I have since found a source fairly locally.

I raided the Snippets Box for some white pieces of cardstock for the Bee wings and also raided my ribbon and fibre basket so I shall take this to the Playground to share around.  Knowing my Nephew the honey is all gone by now.  I know Miss is a little partial to our Honey too so I may be forgiven for missing class this week!!

Can you just say a prayer for our bees right now?  They are not having a good time of late and what with the recent weather  they are really struggling.  

I hope you are having a good weekend so far.  I understand the weather in the UK is great for scrapbooking/quilting/sewing/card making so off you go!  

Hugs

Hettie

Monday, 25 March 2013

Happy Rudolph Day

Hello There

Happy Rudolph Day to you all!  And a cold one it is here in the UK too!  Almost feels like Christmas except there are Easter Eggs in the shops! 

Here is my entry into Rudolph Day pot today....

Made using lots of  Snippets so I shall be taking it over to the Playground too.

What have I done?  The velum on the bottom layer has been in my Snippets box for ages.  Then on top is a piece of watercolour paper which I stamped with my Hero Arts stamp and then inked with alcohol inks.  I did this when I first started with alcohol inks so you can take a guess how old it is.  I then stamped a Papermania stamp twice, coloured them in with my Copics, cut out the poinsettia on one stamping, curled it a little and then popped it over the other image to make it 3D.  (Sorry, forgot to take a sideways photo for you to see it, but trust me!)  I then put little white spots of Sharpies pen on each berry before adding glossy accents to them and the centre of the flower to make them nice and shiny.  A Snippet of ribbon and hey presto a card!

I apologise now for not being around much this last few days.  We have a new settee arriving at Chez Hettie this week and of course, I wanted the lounge redecorated before it comes!!  So out came the paint brushes and all the fun and frolics of removing the old settee into the Den, pictures taken down, curtains down and everything moved hither and yonder!!  Let me tell you, painting a wall that is 21 feet long and 7 feet high and is a stone wall, so has plenty of nooks and crannies, is not easy.  I have to do the other wall later tonight in order that I can put the curtains back up before the delivery men arrive!  Poor Hubby had the unenviable task of painting the wooden ceiling! Let me tell you, I would rather have been crafting!

I hope you have a good week!  I am glad to see that Lent is nearly finished so I can celebrate the new settee's arrival with a Baileys or three over the weekend!!  Hurrah!! 

Do join in the Rudolph Day challenge with my dear Blogging Friend Sandra!

Hugs

Hettie

Sunday, 2 December 2012

Funkie Junkie Tag 2 - Metal Tag

Hello Friends and Fellow Santa's Helpers!

I am back with another Tag for the Funky Junkie's 12 Tags of Christmas Challenge.  Here is Linda's Tag 2 which is the inspiration for us this time round......


Isn't it fabulous!!  Here is mine....

A bit of a manly and metallic tag this time using metal foil tape as the background and giving it a look of rivets and things.  The metal was inked with Alcoholic inks and then rubbed with wire wool.  You have NO idea how much I dislike the feel of wire wool.  You may recall this is Tim Holtz' technique for his September Tag.

This ticket I printed out a few years ago when my friend was in my craft room....it is her stamp.  I remembered it was in the bottom of my Snippet tin.  The Santa was coloured in using Distress Marker pens and a water brush.  The Snowflakes are from a grungeboard set by Mr Holtz and the gears were cut using grungeboard and a TH die, coloured with Rusty Hinge and Walnut Stain DI and embossed with Rusty Hinge Distress Embossing powder.  The top one was painted with Acrylic dabber paint.
A few little Idealogy gears, some glitter (it is Christmas after all) and some tinsel and hey presto one tag.  I may just use this idea for my Brother's Christmas card!
Thanks for calling by and don't forget you can still join in with the Challenge which is being sponsored by The Funkie Junkie Boutique.  

TTFN

Hettie

Thursday, 22 November 2012

Christmas is only ..... days away!!

Hello Friends

I am sure the Elves up in the North Pole are working flat out in readiness for The Man in the red coat to deliver lots of presents next month and much the same can be said for crafters across the globe.  I saw quite a few desks on the WOYWW hop last night with Christmas projects on them.  

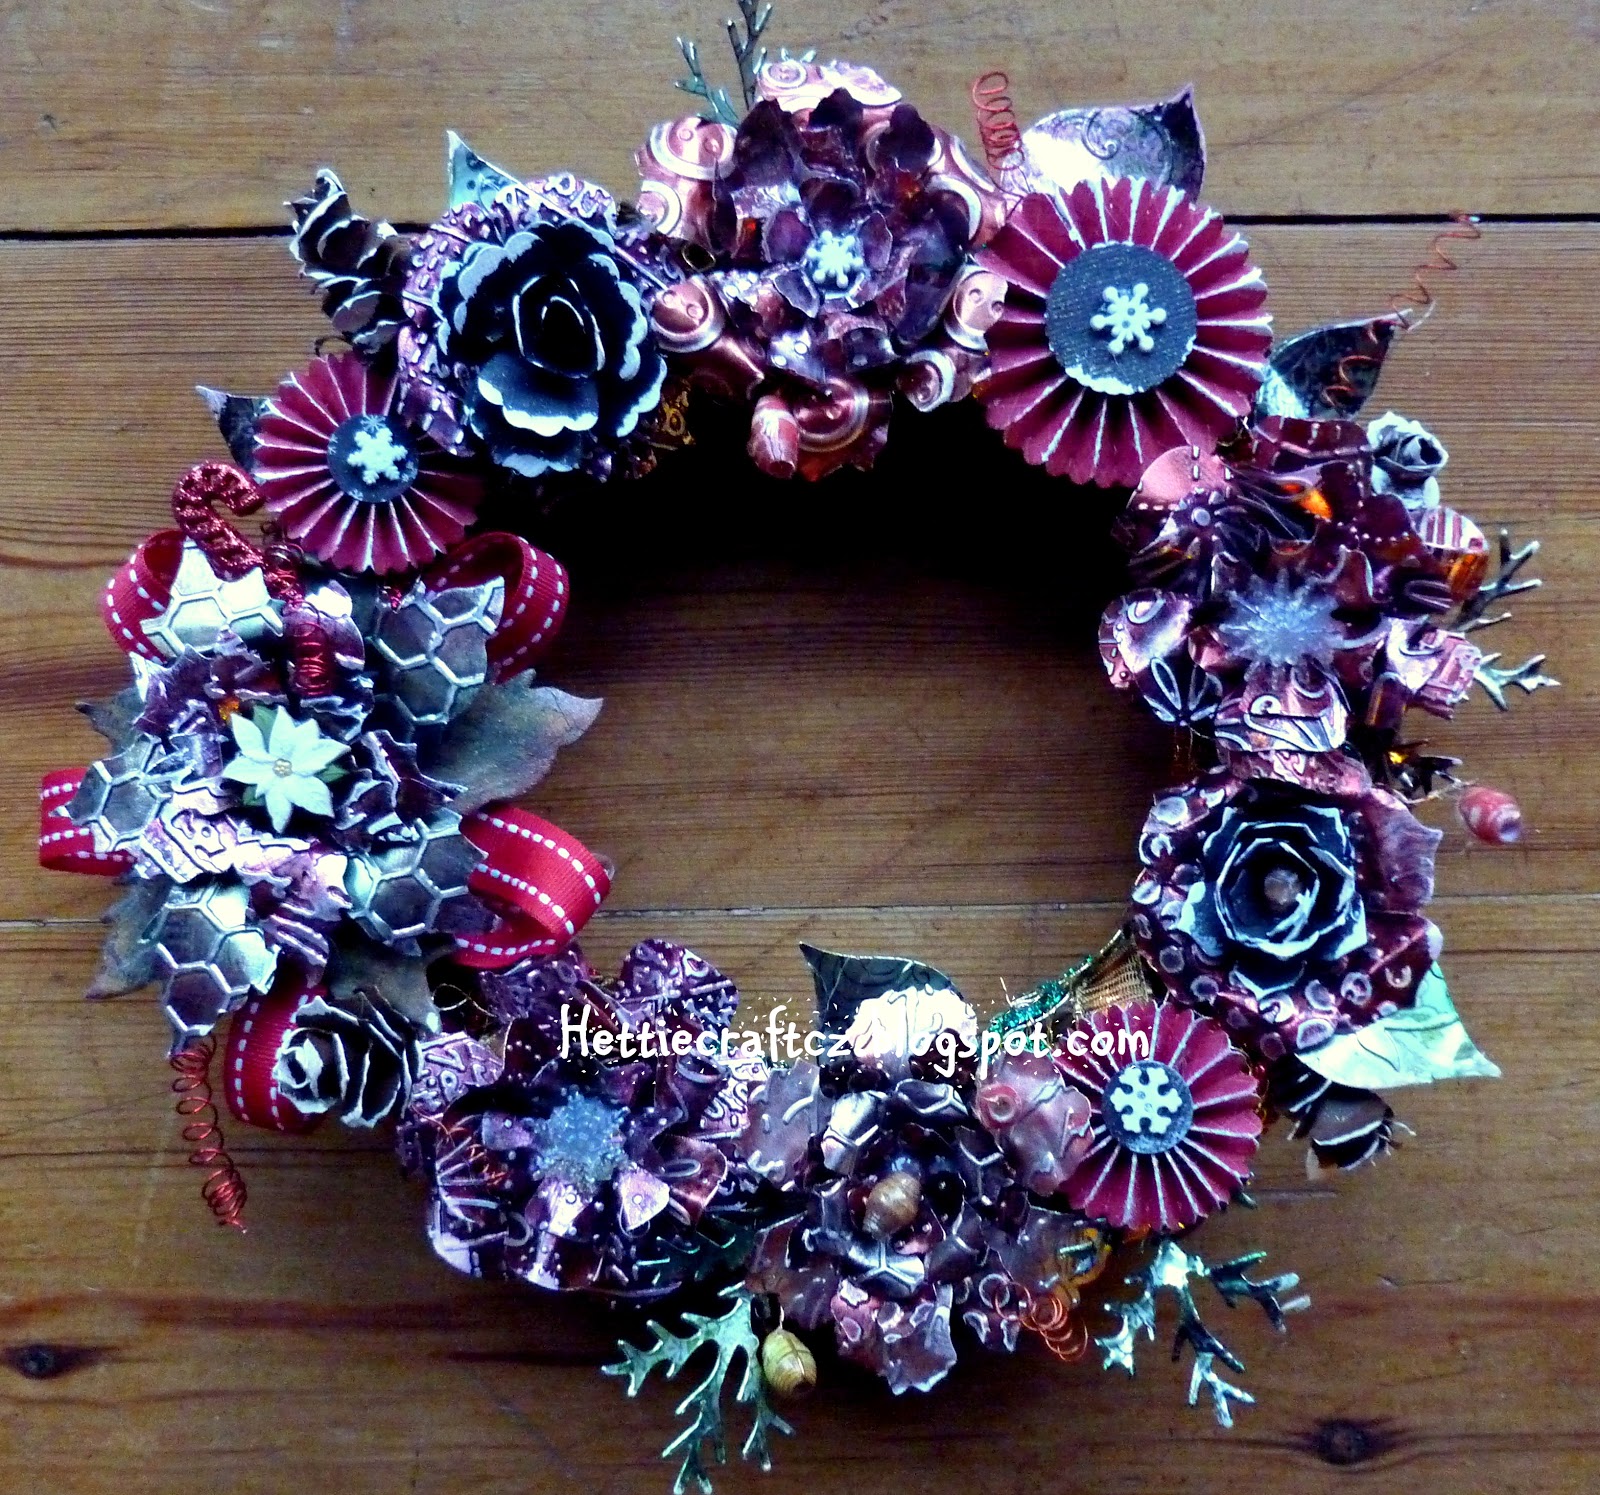
I thought I would share a little something I have made this week and has been in the planning stage for quite some time.  Hope you like it..... 

Shall I let you into a secret?  This Wreath is actually old and recycled!  Yep!  The wreath is willow and I originally decorated it some 4 maybe 5 years ago when I first had my Silhouette machine and discovered Perfect Pearls!!  I cut out lots of leaves out on the Silhouette and then inked them up and sprayed them with Perfect Pearls.  I also made some wire spirals and paper beads, which I had learnt how to make the first time I went to Cornwall. 
And here you can see the wire spirals and paper beads (also recycled).  The flowers are primarily made from metal, some with chipboard bases for firmness.  Some of them are made with metal sheets left over from a project I did in Cornwall nearly 2 years ago and some of them with metal card which I had from Paperartsy when I renewed my subscription to a certain magazine (CS) some time ago.

My new TH Poinsettia dye has been used here with an extra layer at the bottom of chipboard which was covered with paper, inked and stamped.  I wanted to ensure that the poinsettia did not try to wrap itself around the willow wreath.
All the metal was inked with TH alcohol inks, stamped with various stamps, embossed with embossing folders, sanded and then layered using hot glue.  Once I was happy with the flower shape I arranged around the wreath, wrapped the wreath in ribbons, added spirals and beads which were wired in place and then set about attaching the flowers, leaves, pinecones and rosettes using my glue gun. 
Here is a SU punched flower which was actually left over from my recent Halloween Mail Box project which I added some "snow" using my Ranger paint dabber.

Some of the paper beads I used as centres to the flowers and the various snowflake buttons and elements were brought back from the US by my friend last year.  The rosettes were in my box from making them last Christmas for my Christmas Album cover.
Unfortunately these photos were taken in the house so the sheer shimmering effect cannot be appreciated in these photos.  I have sprayed the whole Wreath with Perfect Pearls Heirloom Gold mist which has given it even more shimmeriness!

Thanks for sticking with me to the end!  I hope you like my Wreath and maybe you will feel like making one yourself.  It really is quite simple though a little fiddly.  Also, be careful when using hot glue to affix the metal layers....the metal gets hot too when you push the top layer down with a finger.  Use a pencil instead! 

I am entering this wreath in to the following challenges:-

Compendium of Curiosities - Texture fades
Frilly and Funkie - Chipboard and Metal
Snippets Playground - Snippets
CC101 - Altered Metal 

TTFN

Hugs

Hettie

Wednesday, 14 November 2012

How did I miss this Challenge - Tag 9 - But I will catch UP!

Hello Friends

I was wandering around on the blogasphere recently and I came across THIS wonderful Blog which is Linda Coughlin's of The Funkie Junkie!  Wow!  I was blown away by all the loveliness on her blog and discovered that Linda hosts "The Funkie Junkie's 12 Tags of Christmas" which if you click HERE you will be taken to Tag One which has all the deets on.  It is worth just going to see all nine tags, they are gorgeous.

I know Linda is currently on Tag 9 and there are only three more to go but there is still a while to go until the Big Day itself so I guess I can give it a go.  They are sooo scrummilicious I just have to join in!  There is also a chance to win a shopping spree as these challenges are sponsored by The Funkie Junkie shop.  Let me tell you, having had a peruse and a little shop there, having recently won the CC2C Challenge, it is worth the chance to win! 

So here is Linda's tag......

Didn't I tell you it was scrummy!

Now here is my take on Linda's tag.......
Instead of stars I have used hearts made from Snippets of SU Vanilla cardstock, die cut with a Sizzix die and stamped in Barn Door with my new Wendy Vecchi stamp (in love with these and they were a steal so it would have been rude not to have bought them!).  The burlap pieces were also Snippets from my Christmas Album project.  The key was out of my jar of odd keys and watch bits (I have been told by a high authority - Mr Hettie - that it was the old key for the shed) which I coloured with black alcoholic ink, along with the mini bells hanging on the mini hearts of course!
The Holly leaves were cut out of another Snippet of SU Vanilla cardstock (I keep every piece of the SU Vanilla cardstock in a separate bag as it is great to work with), inked with Pine Needles DI, a little Fresco Snowflake paint topped with glossy accents and some Hampton Art fine glitter sprinkled over the top.  Once dried I added a little more Pine Needles around the edges.
These mini hearts were die cut with chipboard then some Ferro and Puffed Paint were smooshed over and heated with the heat gun.  Love this Ferro.  It is soo schparkly in the natural light. I crimped some wire through the crimping tool and added the bells to the hearts and wired them to the key.  I also popped two star pins into the bow, which is a Snippet of fabric my quilting friend gave to me.

The base of the tag is Kraft cardstock which I ran through the TH woodgrain embossing folder.  I painted this with the Snowflake Fresco paint and once dried added a layer of TH Rock Candy Crackle paint and once that was dried I added some Black Soot DI.

A little TH ticket and some gingham ribbon and hey presto, my tag was finished.  Now then, which one shall I do next?

You have until 17th December to catch up with all 12 tags and there is a chance to win a prize  from the sponsor Funkie Junkie  Love their goodies and to be honest, postage was not an awful lot in the context of things and pretty quick to the UK (8 days from order to parcel!).

As there are a few Snippets on this I will be linking it up to my Buddie at the Playground.

Thanks for popping by and please feel free to leave me a comment.  Gotta love comments. And finally, thank you Linda for such a wonderful Challenge, I have enjoyed making this no end, and think it will live in my kitchen.  Anyone who has been in my kitchen will know there are a collection of hearts in there!

TTFN

Hettie


Wednesday, 31 October 2012

It's Spooky Night....Beware!

Hello Ghosts, Ghouls, Witches and Goblins everywhere and Welcome!!

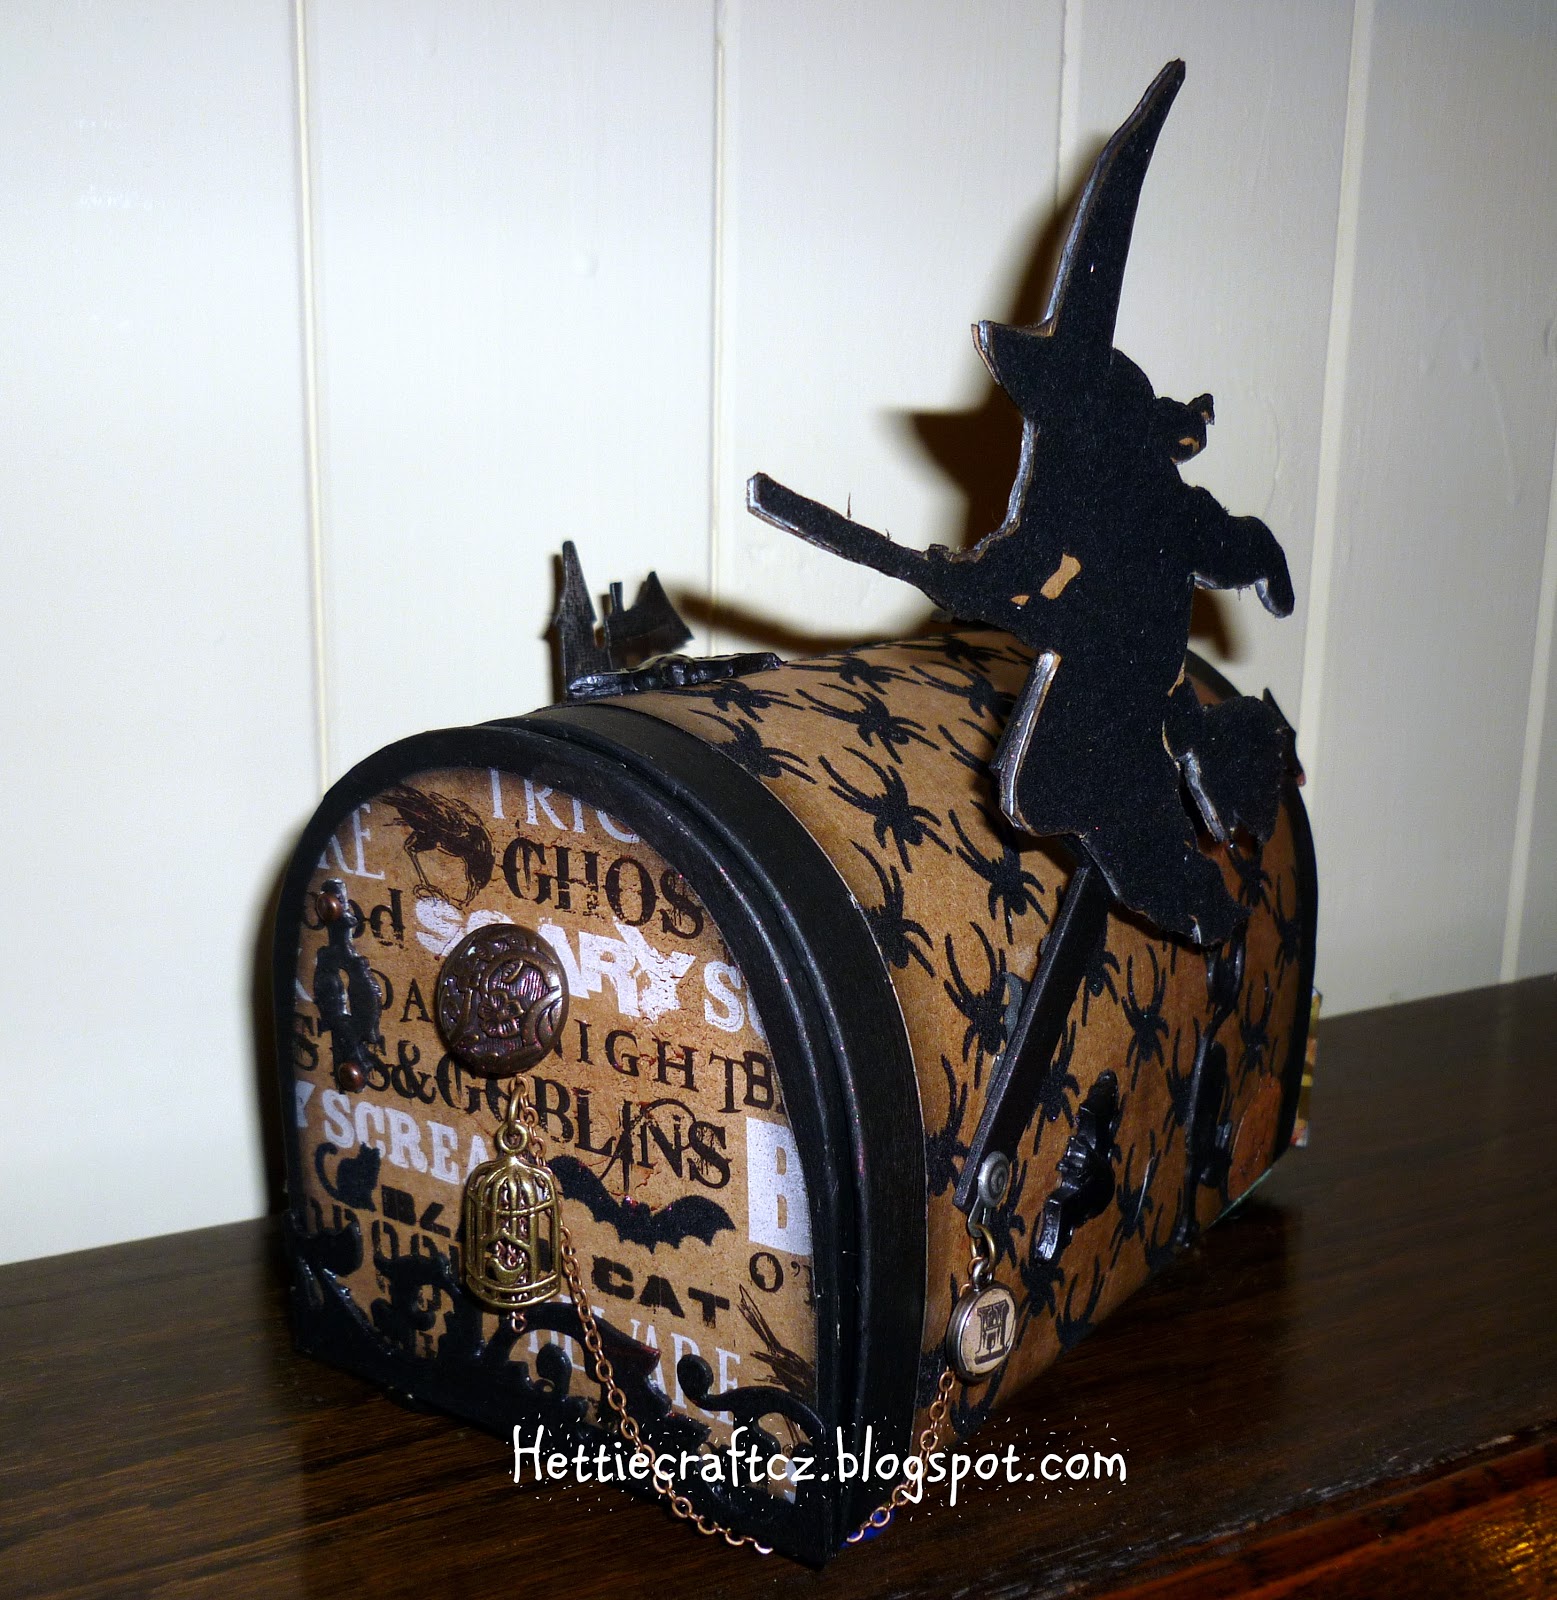
As it is Hallowe'en today I thought I would share with you my latest creation!  It is a long picture heavy post so the cauldron is on, get yourself a cup of Poison, maybe grab a few Dragon's Breath cookies or some Frog Spawn pudding and take a peek. It is not like we are going to see too many Witches out and about tonight!  It is pouring down here so there will be many a fire damped down.  Hope you like....

A Maya Road Post Box which I ordered from USA about 4 years ago "just because" and have been gathering little bits and pieces and ideas waiting for the right time to make this box into something magical.  

Be careful of the bottle of poison on the left.  The Owl at the back is keeping his beady eye on you too!
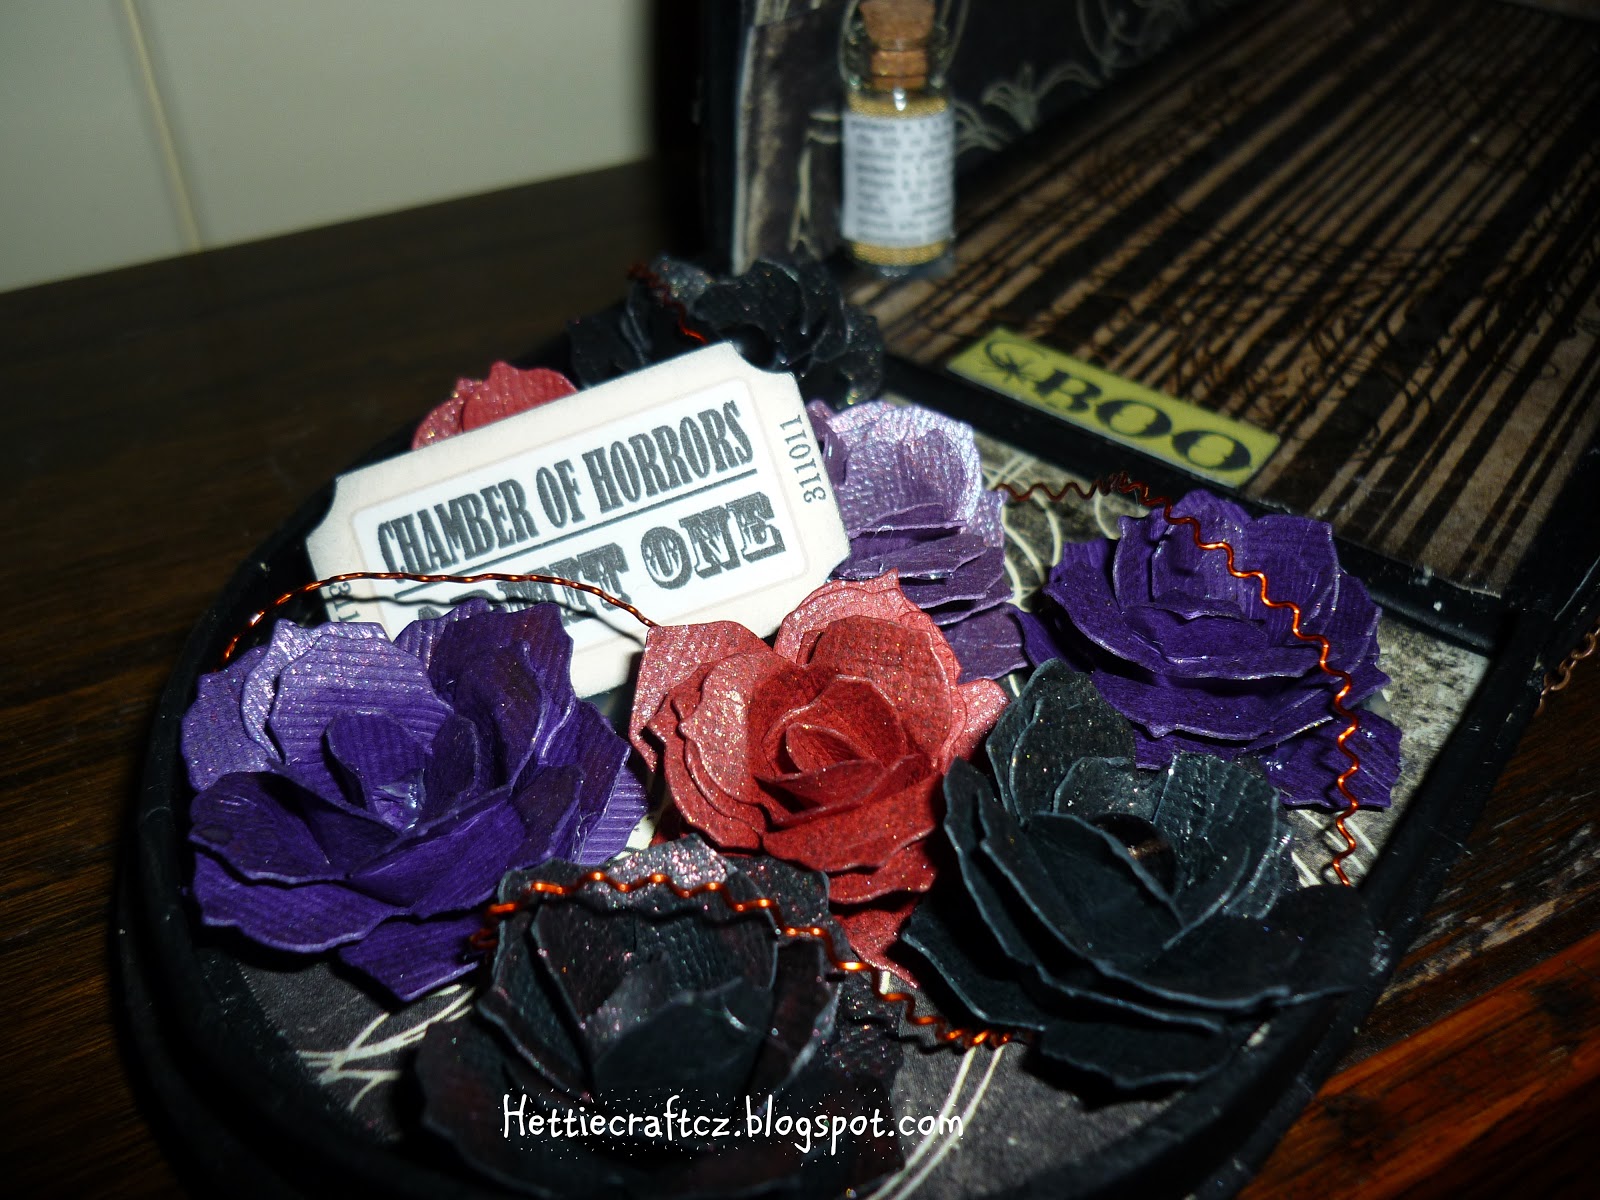
Some Roses made from the Tattered Pinecone die by Tim Holtz.


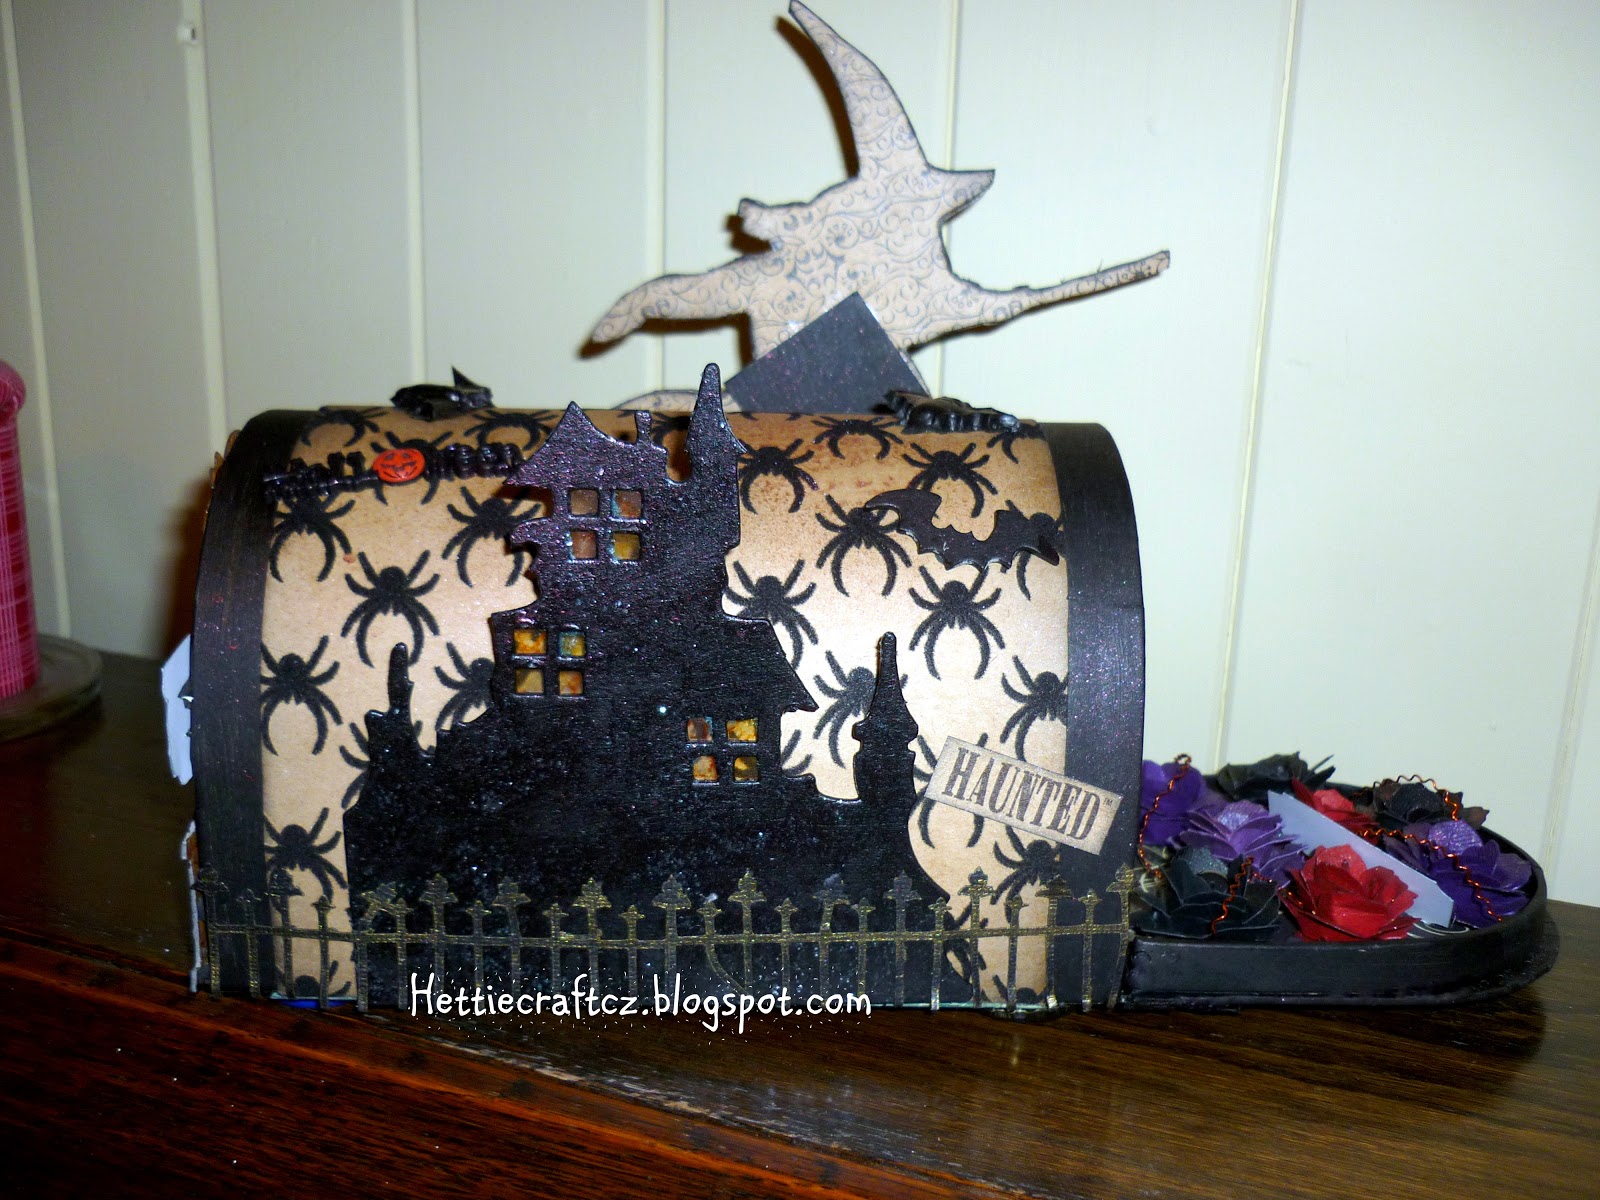
And no Hallowe'en project would be complete without a Haunted House complete with rusty railings. 
And inside a little book of Potions ....
Notice the glow in the dark skeleton hiding on the ring?


The box was first painted black with acrylic paint dabber and then papered with flock papers from MME. 

Home made Fimo Bats! 

Here are the feet....two bottles of Witches Brew and two bottles of Hobgoblin Brew were drunk to create this project!  All in the name of Art don't you know?
I am going to enter this project into the following Challenges:-

CC101 - Holiday anything goes!
Snippets with Pixie- anything using snippets
Inspiration Emporium - Spooktacular Decorations

In my haste to post this project last night (technical issues - grrr) I forgot to post it into the Challenge over at Simon Says Stamp. whose challenge is Pearls.  Although the photos don't show them up very well, there are Perfect pearls on the book as well as all being sprayed with both Heirloom Gold and Forever Red liberally.  In fact my Craft room floor is glimmering right now!

Terry has very kindly let me know of another Challenge blog which I have not come across before, and I can pop this piece on there.  Please go and see them there is some fabulous Spooky work over there.  Link is HERE and it is Fashionable Stamping Challenges!

Off you go Trick or Treating and I hope you get lots of healthy treats!!  Honest!

Wahahahahahahaha!

Hettie


Ingredients:-  Distress Inks, Grungeboard, Grungepaper, Tattered Pinecone die, On the edge dies, memo pins, Archival inks, Perfect pearls sprays, acrylic paint dabber, Rock candy Distress stickles, Alcohol inks, Button, Perfect pearls, Perfect pearls mist, tassel - All Ranger, My Mind's Eye papers, Pink Paisley papers, Bazzill cardstock, brads, chain, fimo, silicone mould, Silhouette images, Stamps MME, DoCrafts, Tim Holtz, Craft Stamper, Rusty embellishments, ribbons, Hampton Art glitter, Glossy accents, Claudine Hellmuth medium. 

Wednesday, 10 October 2012

CC2C - Like a bit of alcohol.....ink!

Hello Friends

Linda over at StudioL3 has asked us this week to turn to page 59 of the Compendium of Curiosities 2  and following the instructions there make our creation.  I cannot tell you the techniques used but I can tell you it involves alcohol ink.  So here is mine......

I used the 1.5" Memory Glass and frame to make a double sided piece for my Christmas Album that I am currently making, which piece I want to hang on the spine of the book.  Here is the other side.....
I used Terracotta, Red Pepper, Cranberry and Black alcohol inks all by Ranger and then two of Mr T!m Holtz's lovely Christmas stamps to create the pattern with Archival ink.   The frame is also by Ranger and you are not seeing double with the link on the top, I have already added a jump ring to enable me to hang the frame when it is ready! There is also Snippets of metal foil in between the glass so that you can see the stamped patterns nicely.

And just so you can see my Christmas Album in creation (not finished yet), I can show you the undecorated cover with a few other embellishments I want to use on the cover/spine of it....
Thanks for popping by and please leave me a comment.  There is still time for you to join in with this Challenge as you have until Thursday evening.  I am quite surprised that we are on Challenge 24 this week!  It doesn't seem that long ago we started on the first Challenge!  I do love these challenges so thanks Linda!

Don't forget to call in at Mr T!m Holtz's blog for more wonderful ideas and creations.

TTFN

Hettie 

Wednesday, 26 September 2012

A Reflective Piece - CC2C & Tim Holtz

Hello Friends

I thought I would share with you something I have been working on the last few evenings.  Linda over at Studio L3 has asked us to turn to page 57 of the Crafters Compendium II and make a piece of artwork using the technique on that page.  This month The Funkie Junkie Boutique are sponsoring the challenge giving away a $25 voucher.  This week's challenge happens to coincide with Tim Holtz's 12 Tags of 2012, so it is a twoferone week!!

Here is a my piece.....

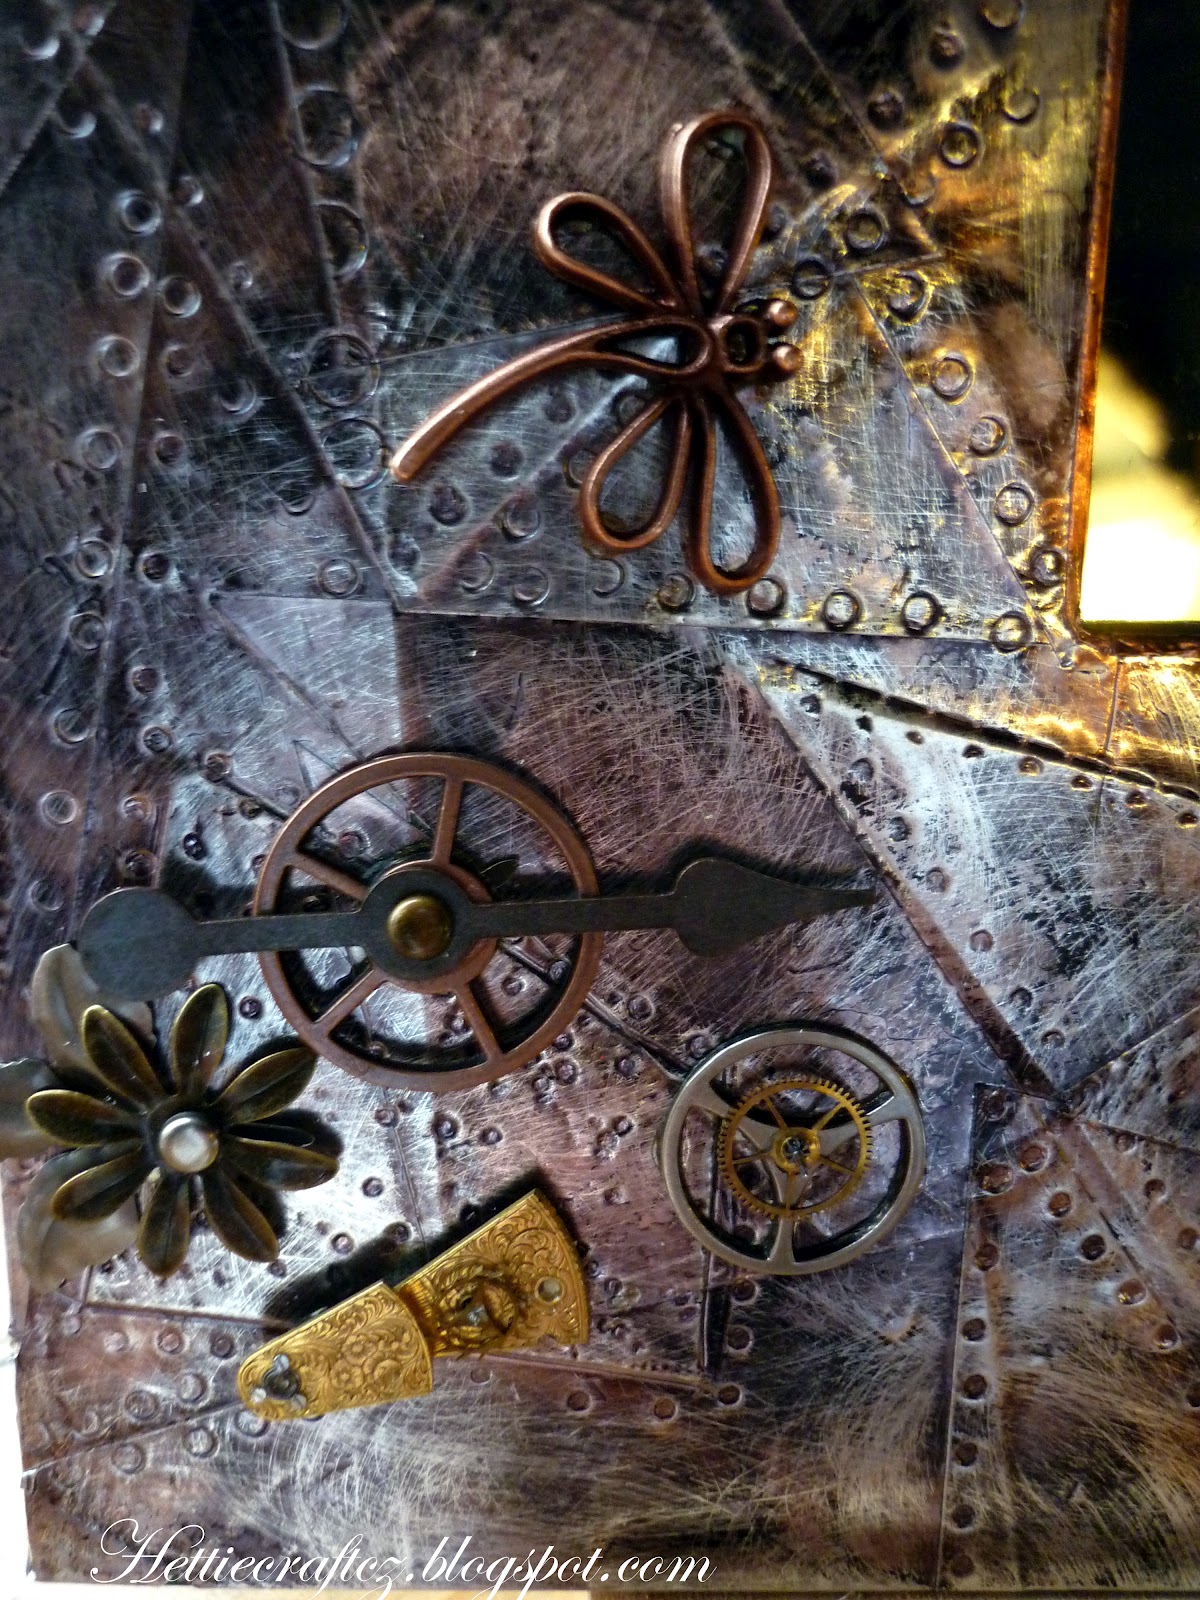
A little bit bigger than a tag or card from me this time!!  The whole surround to the mirror is about 11" square.  I have been holding on to it for quite some time with the intention of covering it with paper and making an arty piece but when I saw the new Crafters Compendium with this technique I knew what I would be doing with it.  So, when I saw Linda's Challenge for this week I dug out the mirror and set to work in making this piece. 
I have added some metal embellishments  which I have collected along the way.

Including some watch pieces saved from previous projects,  some of which are real watch pieces.
And of course, some die cuts from Ranger and a rusty cockeral in the middle.  For some reason our cockeral has not quite got used to the darker mornings and is to be heard at 5am!!
I just love this little piece which I bought in Hobbycraft a month or so ago.  Wish I had bought another one now.  I love the way the light reflects on this piece but it makes it difficult to take decent photos, especially early in the morning on a dull day!


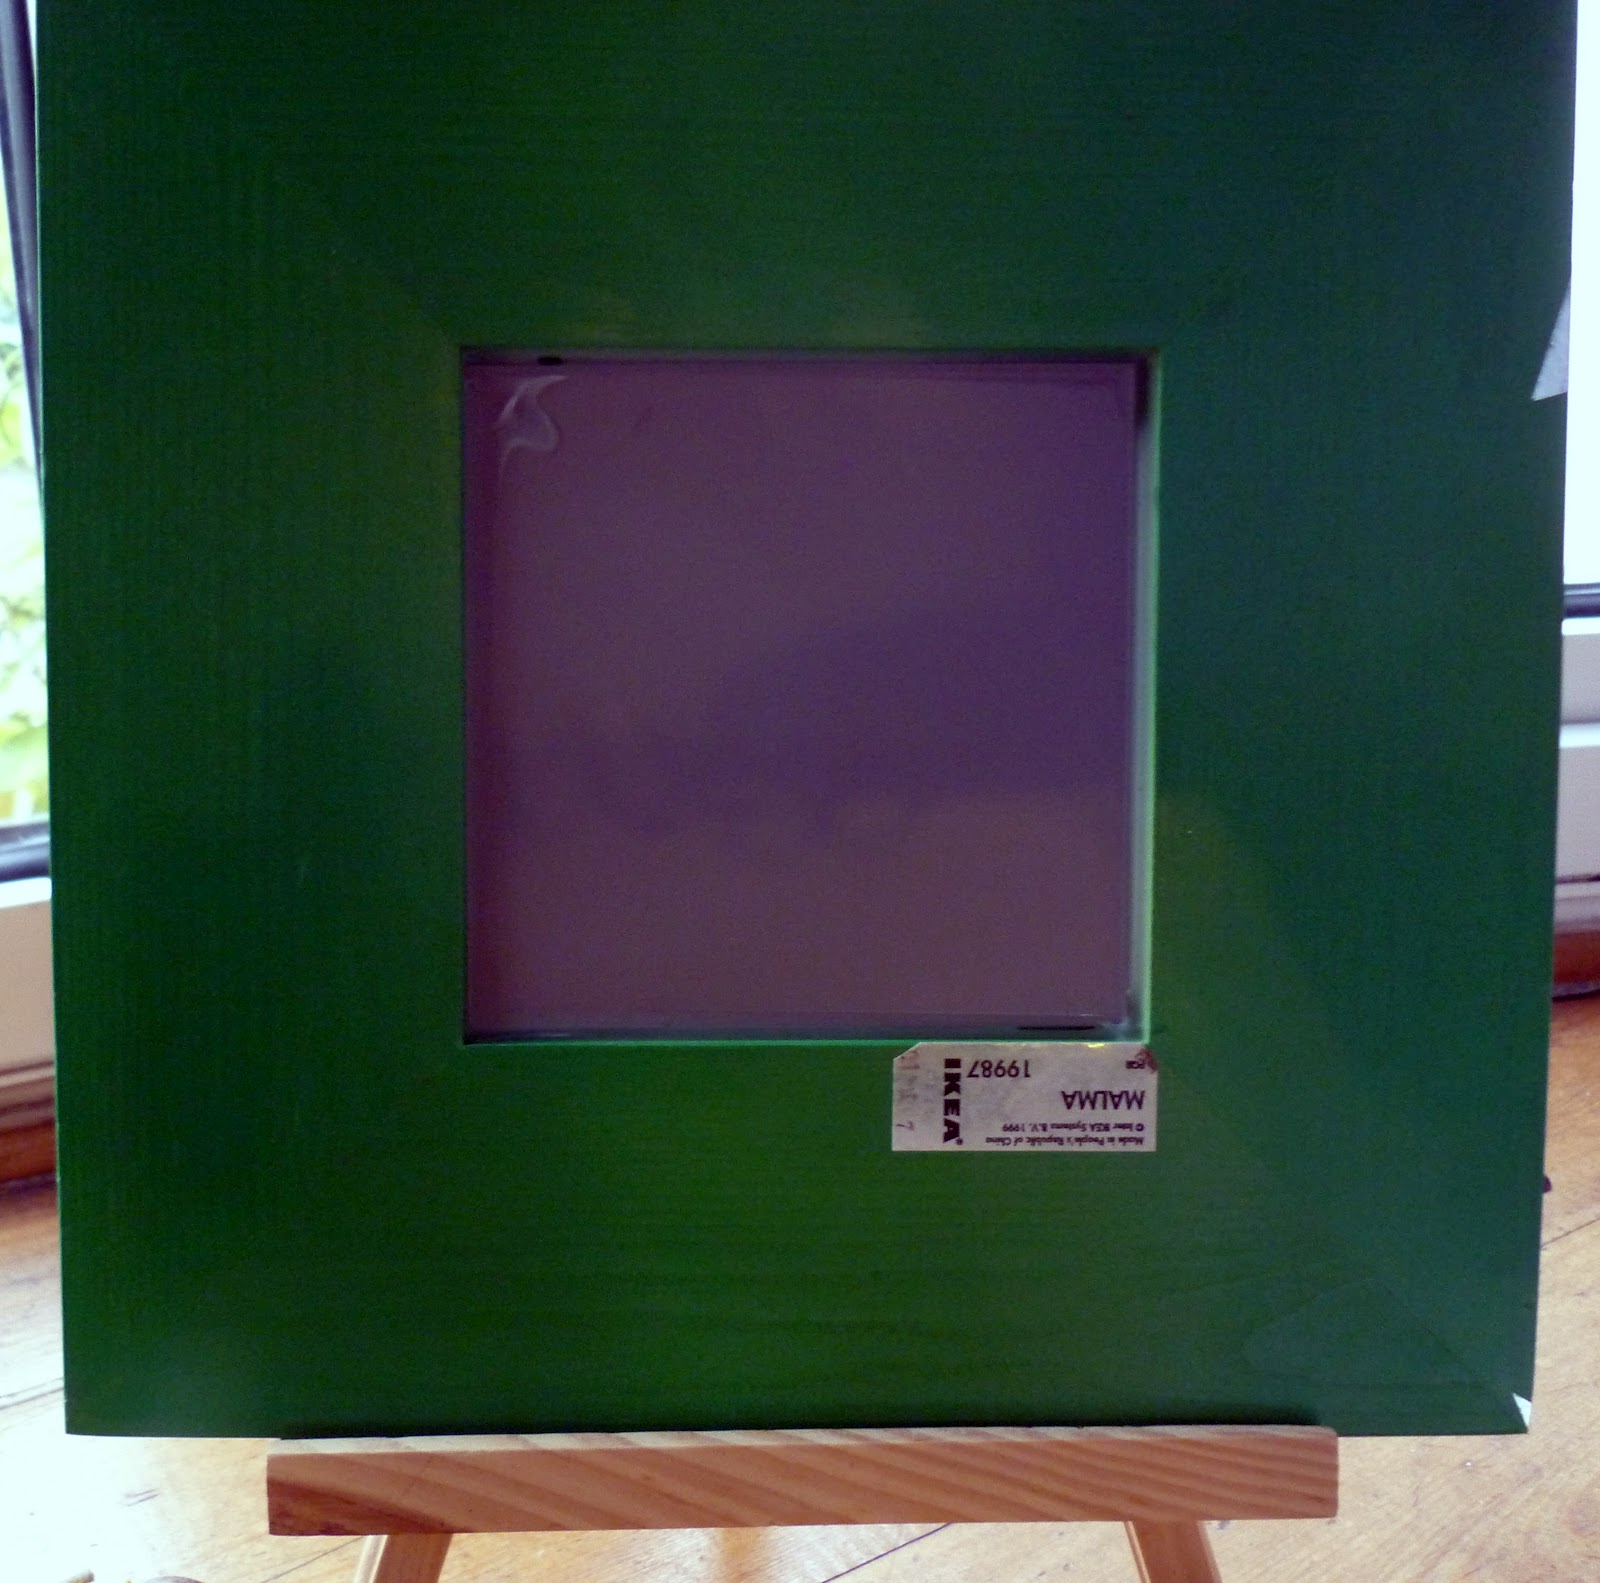
Here you can see a before and after version with the back of the mirror as it is now and the new version.  Think I like the right hand one better myself!  (Though I was finding it difficult to take a picture without my face in it....I can assure you that at this close range and first thing in the morning that would be scary!) 

Now what am I going to do with this? is a question I was asked last night by my friend.  Not sure yet.  I thought about a C gift for my nephew and his soon to be wife, but Hubby says no!  Put it in the Den and make another one for Rhys was his reply. The first is always better than subsequent ones. I did warn him that would mean another trip to the "Ishopwhichcannotbenamed" (Ikea!)!!  Hee Hee!  We shall see ey!

Thanks for popping by.  Do go and look at the lovely pieces that have been made both on the Tim Holtz Blog and Linda's.  There are some stunning pieces.  And of course, don't forget to check out the Funkie Junkie if you want/need some stash!

TTFN

Hettie